
What is this product used for?
Connecting compatible hose to a quick-coupling system.

Commercial Products
Commercial Products
 Professional Growing Media
 Plant Nutrition
 Plant Health
 Sprayers & Protective Clothing
 Pots, Planters & Trays
 Propagation
 Baskets & Planters
 Fabrics & Netting
 Environment
 Plant Lighting
 Irrigation
 Plant Support & Tree Care
 Equipment
 Tools
 Plant Labels
 Packaging
 Lawn Care
 Clearance
Retail Products
Retail Products
 Growing Media
 Plant Nutrition
 Plant Health
 Pots, Planters & Tanks
 Propagation
 Baskets & Planters
 Fabrics & Netting
 Environment
 Plant Lighting
 Plant Support
 Equipment
 Tools

131 products
131 products
Sort by:
£4.25
Unit price per£4.25
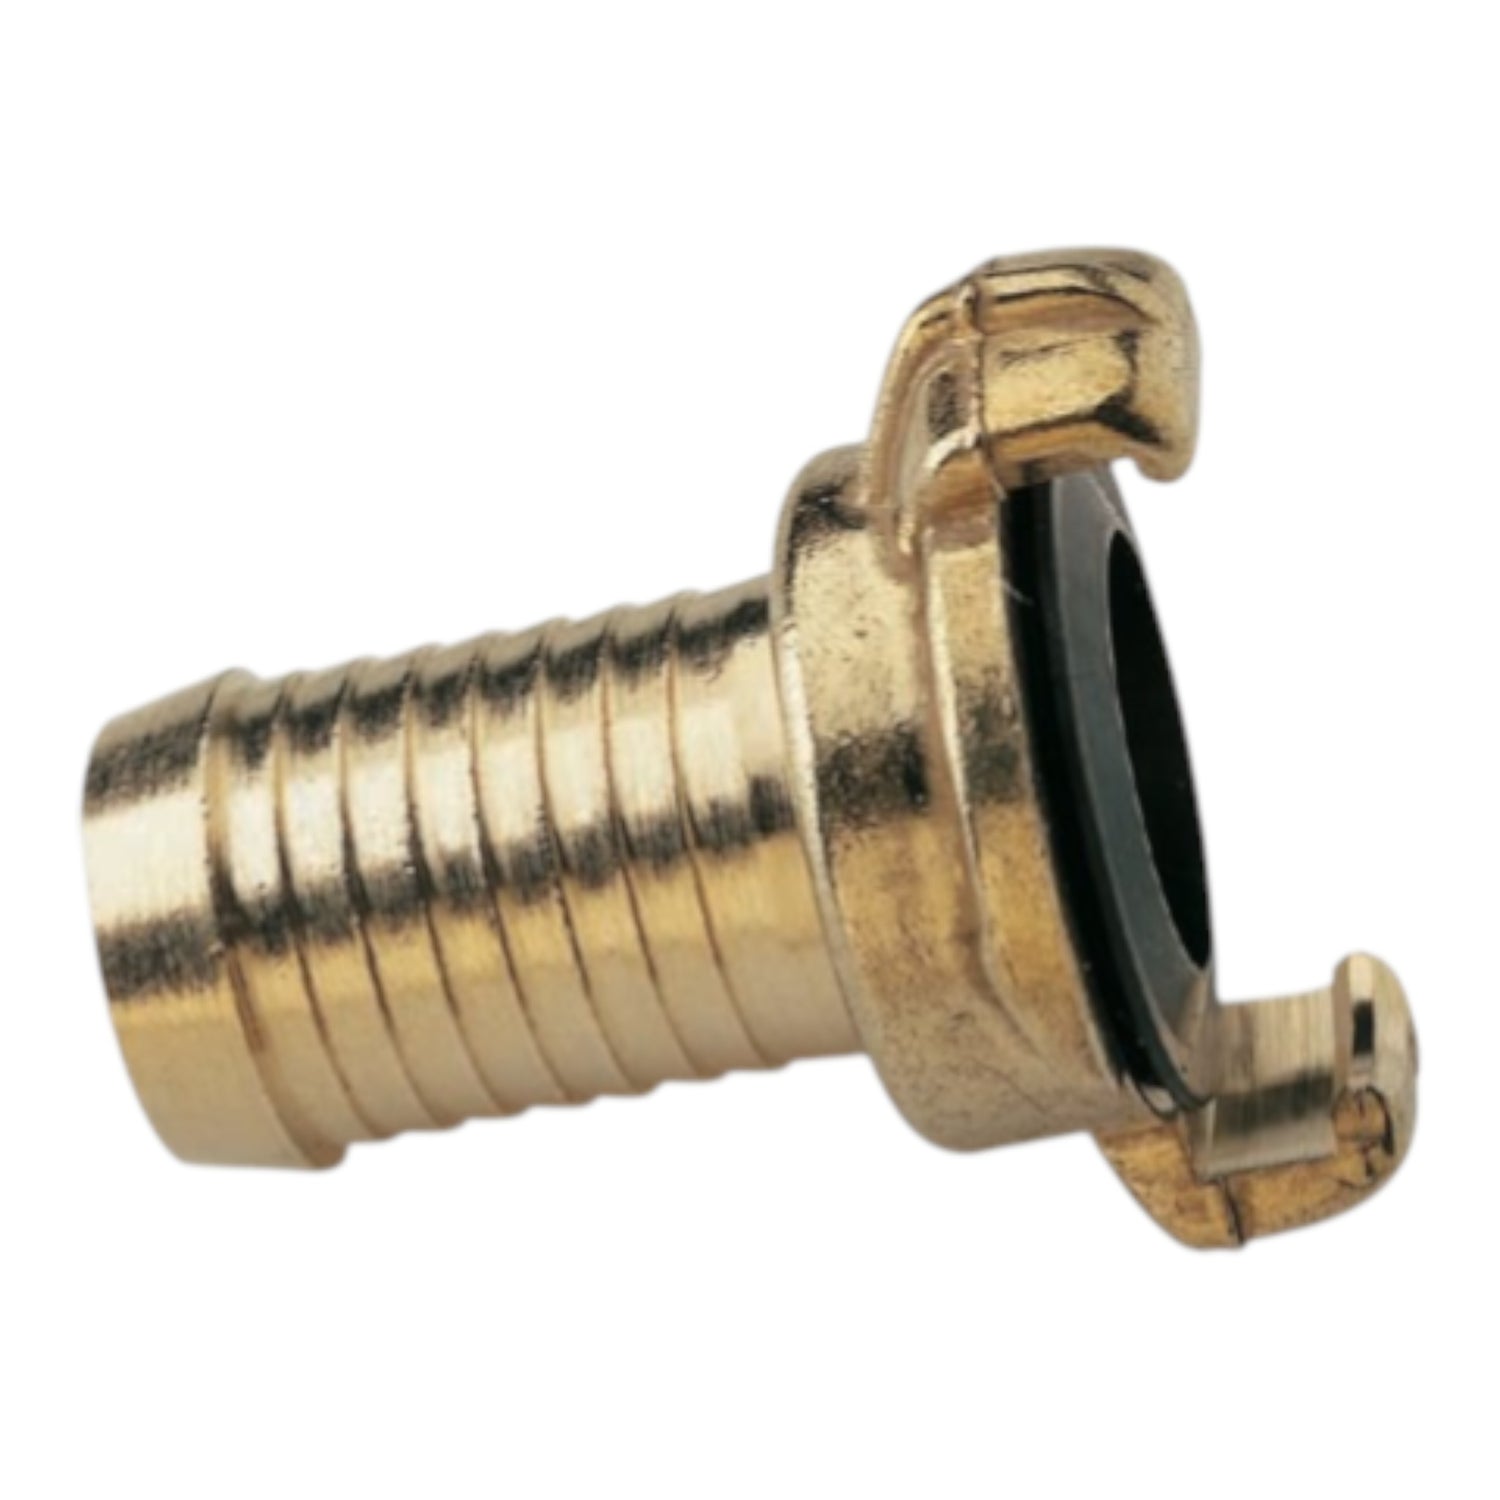
Unit price perThe Quick-Coupling Barbed Hose Fitting - Hose diameter 3/4" (19mm) is designed for connecting compatible hose to a quick-coupling system in professional horticultural, nursery, landscape and garden watering systems.
Correct hose fittings and storage equipment help keep watering systems organised, serviceable and easier to move between working areas.
Key benefits
Building serviceable hose connections
Match the fitting to the stated hose diameter and coupling system. Push barbed fittings fully into compatible hose and secure them using the appropriate method for the system.
Keep sealing faces and washers clean. If a connection leaks, inspect the seal, hose end and coupling condition rather than relying on excessive tightening.
Watering-system setup
Choose hose diameter and fittings according to the required flow, run length and available water pressure. Long hose runs and restrictive fittings can reduce pressure and flow at the watering lance or outlet.
Leak checks & maintenance
Inspect hose ends, seals, couplings and moving trolley parts periodically. Replace split hose, worn seals and damaged fittings rather than accepting persistent leakage.
Storage
Store hose and fittings clean and protected from unnecessary physical damage. Avoid leaving hose tightly kinked or under tension around fittings during storage.
Quick-Coupling Barbed Hose Fitting - Hose diameter 3/4" (19mm) product details
| Product type | Quick-Coupling Barbed Hose Fitting |
|---|---|
| Primary use | connecting compatible hose to a quick-coupling system |
| Source designation | Quick-Coupling Barbed Hose Fitting - Hose diameter 3/4" (19mm) |
| Application | Professional horticultural and garden watering systems |
Quick-Coupling Barbed Hose Fitting - Hose diameter 3/4" (19mm) FAQs
What is this product used for?
Connecting compatible hose to a quick-coupling system. How do I check compatibility?
Match the stated hose diameter, fitting type and coupling system to the equipment already in use. Can different hose diameters use the same fitting?
Not unless the fitting is specifically designed for those sizes. Use the stated compatible diameter. What should I check if a hose connection leaks?
Inspect the hose end, seal, washer and coupling surfaces and replace damaged components. Does hose length affect water delivery?
Yes. Longer runs and restrictive fittings can contribute to pressure loss and reduced flow. How should hose equipment be stored?
Keep it clean and protected and avoid severe kinks, crushing or continuous strain on fittings. Should fittings be inspected regularly?
Yes. Check seals, coupling faces and hose connections for wear or damage. Can hose trolleys be overloaded?
Use each component only within the capacity and application appropriate to the complete watering system.

The Hose Coupling Seal is designed for replacing the seal in a compatible hose coupling in professional horticultural, nursery, landscape and garden watering systems.
Correct hose fittings and storage equipment help keep watering systems organised, serviceable and easier to move between working areas.
Key benefits
Building serviceable hose connections
Match the fitting to the stated hose diameter and coupling system. Push barbed fittings fully into compatible hose and secure them using the appropriate method for the system.
Keep sealing faces and washers clean. If a connection leaks, inspect the seal, hose end and coupling condition rather than relying on excessive tightening.
Watering-system setup
Choose hose diameter and fittings according to the required flow, run length and available water pressure. Long hose runs and restrictive fittings can reduce pressure and flow at the watering lance or outlet.
Leak checks & maintenance
Inspect hose ends, seals, couplings and moving trolley parts periodically. Replace split hose, worn seals and damaged fittings rather than accepting persistent leakage.
Storage
Store hose and fittings clean and protected from unnecessary physical damage. Avoid leaving hose tightly kinked or under tension around fittings during storage.
Hose Coupling Seal product details
| Product type | Hose Coupling Seal |
|---|---|
| Primary use | replacing the seal in a compatible hose coupling |
| Source designation | Hose Coupling Seal |
| Application | Professional horticultural and garden watering systems |
Hose Coupling Seal FAQs
What is this product used for?
Replacing the seal in a compatible hose coupling. How do I check compatibility?
Match the stated hose diameter, fitting type and coupling system to the equipment already in use. Can different hose diameters use the same fitting?
Not unless the fitting is specifically designed for those sizes. Use the stated compatible diameter. What should I check if a hose connection leaks?
Inspect the hose end, seal, washer and coupling surfaces and replace damaged components. Does hose length affect water delivery?
Yes. Longer runs and restrictive fittings can contribute to pressure loss and reduced flow. How should hose equipment be stored?
Keep it clean and protected and avoid severe kinks, crushing or continuous strain on fittings. Should fittings be inspected regularly?
Yes. Check seals, coupling faces and hose connections for wear or damage. Can hose trolleys be overloaded?
Use each component only within the capacity and application appropriate to the complete watering system.
£229.60
Unit price per£229.60
Unit price perThe HydroPC 16mm Pressure Compensated Drip Line - 1.6L/h - 30cm Spacing - 400m is a 16mm pressure-compensated drip line supplied in a 400m roll, with stated emitter flow of 1.6L/h and 30cm emitter spacing.
It is designed for compatible professional nursery, greenhouse and horticultural irrigation systems where emitter spacing and flow are matched to crop layout and water demand.
Key benefits
Matching emitter spacing to the crop
This line uses 30cm emitter spacing. Select spacing according to crop layout, substrate or soil wetting pattern and the number of emitters required across the root zone.
Closer spacing increases the number of emitters operating over a given run length and therefore changes total zone flow demand.
Emitter flow & irrigation scheduling
The stated emitter flow is 1.6L/h. Irrigation duration should be based on crop demand, root-zone volume, weather and actual system output rather than a fixed run time.
Pressure compensation is intended to support more consistent emitter performance within the product operating conditions, but the complete system still needs appropriate pressure, filtration and hydraulic design.
Planning irrigation zones
Calculate the number of operating emitters or outlets and total flow demand before finalising a zone. Long runs, elevation changes and undersized supply pipework can affect pressure and irrigation uniformity.
Divide systems into manageable zones where necessary rather than exceeding the available water supply or the practical hydraulic capacity of the installation.
Filtration, flushing & commissioning
Use filtration appropriate to the water source and emitter waterways. Flush new lines before routine use where appropriate, then run the system and inspect representative outlets for expected delivery.
Maintain filters and flush lines according to water quality and system requirements. Investigate blocked emitters, leaks or damaged pipe promptly.
Installation & storage
Route lines without kinking or crushing and protect them from sharp edges and traffic. Store unused coils clean and protected from physical damage before installation.
HydroPC 16mm Pressure Compensated Drip Line - 1.6L/h - 30cm Spacing - 400m product details
| Product | HydroPC Drip Line |
|---|---|
| Pipe size | 16mm |
| Roll length | 400m |
| Stated emitter flow | 1.6L/h |
| Emitter spacing | 30cm |
| Pressure compensated | Yes |
HydroPC 16mm Pressure Compensated Drip Line - 1.6L/h - 30cm Spacing - 400m FAQs
How long is the supplied roll?
The supplied roll length is 400m. What spacing is stated?
The stated outlet/emitter spacing is 30cm. What emitter flow is stated?
The stated emitter flow is 1.6L/h. How do I know how much water the zone requires?
Calculate the number of operating emitters or outlets and their flow, then compare total demand with the available water supply and hydraulic design. Is filtration important?
Yes. Suitable filtration helps protect small emitter waterways and maintain irrigation uniformity. Should new irrigation lines be flushed?
Flush and commission lines as appropriate to the system before relying on them for crop irrigation. Can very long runs affect uniformity?
Yes. Run length, elevation, pipe size, total flow and pressure all influence system performance. How should the line be installed?
Avoid kinks, crushing and sharp edges and protect the line from traffic or other physical damage. How should irrigation performance be checked?
Inspect and, where useful, measure output at representative points across the zone and investigate meaningful differences.
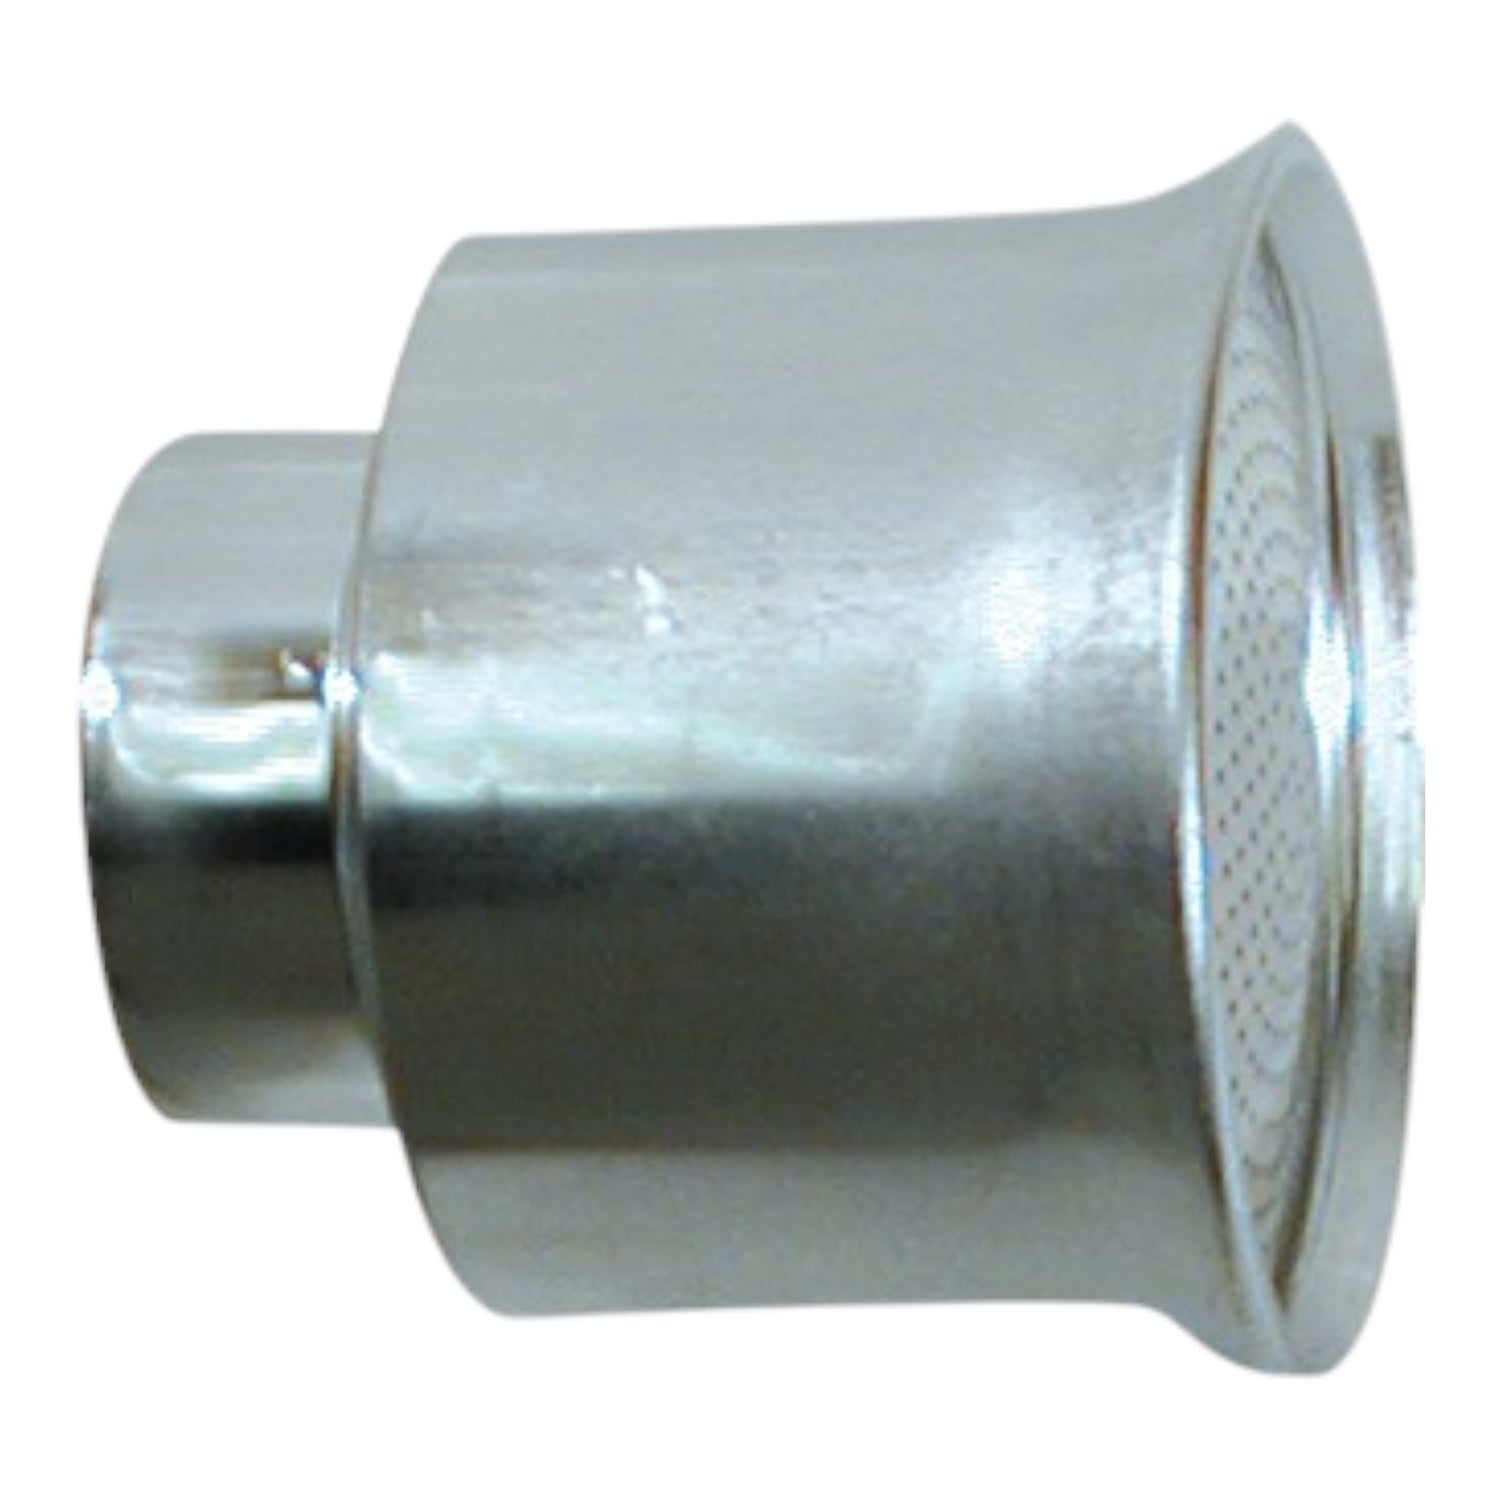
The GEKA Large Alloy Rose 3/4" Female STANDARD is a GEKA watering rose designed for producing a dispersed watering pattern from a compatible lance or 3/4-inch fitting.
Professional hand watering allows growers to direct water where it is needed and adjust technique to the crop, container size and growing environment.
Key benefits
Choosing & maintaining a watering rose
Fit the rose only to a compatible lance or fitting. Select the watering pattern to suit the crop and avoid using excessive pressure that can disturb growing media, seedlings or delicate foliage.
Keep rose openings clean and remove mineral or debris build-up if the watering pattern becomes uneven.
Watering crops effectively
Water demand changes with crop size, container volume, substrate, temperature, light and airflow. Check the crop and growing medium rather than applying the same volume automatically to every plant.
Where possible, water evenly and allow appropriate drainage, adjusting frequency and volume to the crop rather than compensating for poor irrigation uniformity with excessive water.
Care & maintenance
Keep connections, valves and rose openings clean. Inspect seals and threaded fittings periodically and replace worn parts when leakage or poor operation develops.
GEKA Large Alloy Rose 3/4" Female STANDARD product details
| Brand | GEKA |
|---|---|
| Product type | Watering rose |
| Primary use | producing a dispersed watering pattern from a compatible lance or 3/4-inch fitting |
| Connection | 3/4" |
| Rose pattern | Standard |
GEKA Large Alloy Rose 3/4" Female STANDARD FAQs
What connection size is stated?
The stated connection is 3/4". Check compatibility with your existing fittings before ordering. What is a watering rose used for?
It breaks the water stream into a broader pattern for gentler, more even hand watering. How do I stop the rose pattern becoming uneven?
Keep the openings clean and remove debris or mineral deposits when required. Should I always use maximum water pressure?
No. Use enough pressure for an even pattern without disturbing the growing medium or damaging delicate plants.
£0.34
Unit price per£0.34
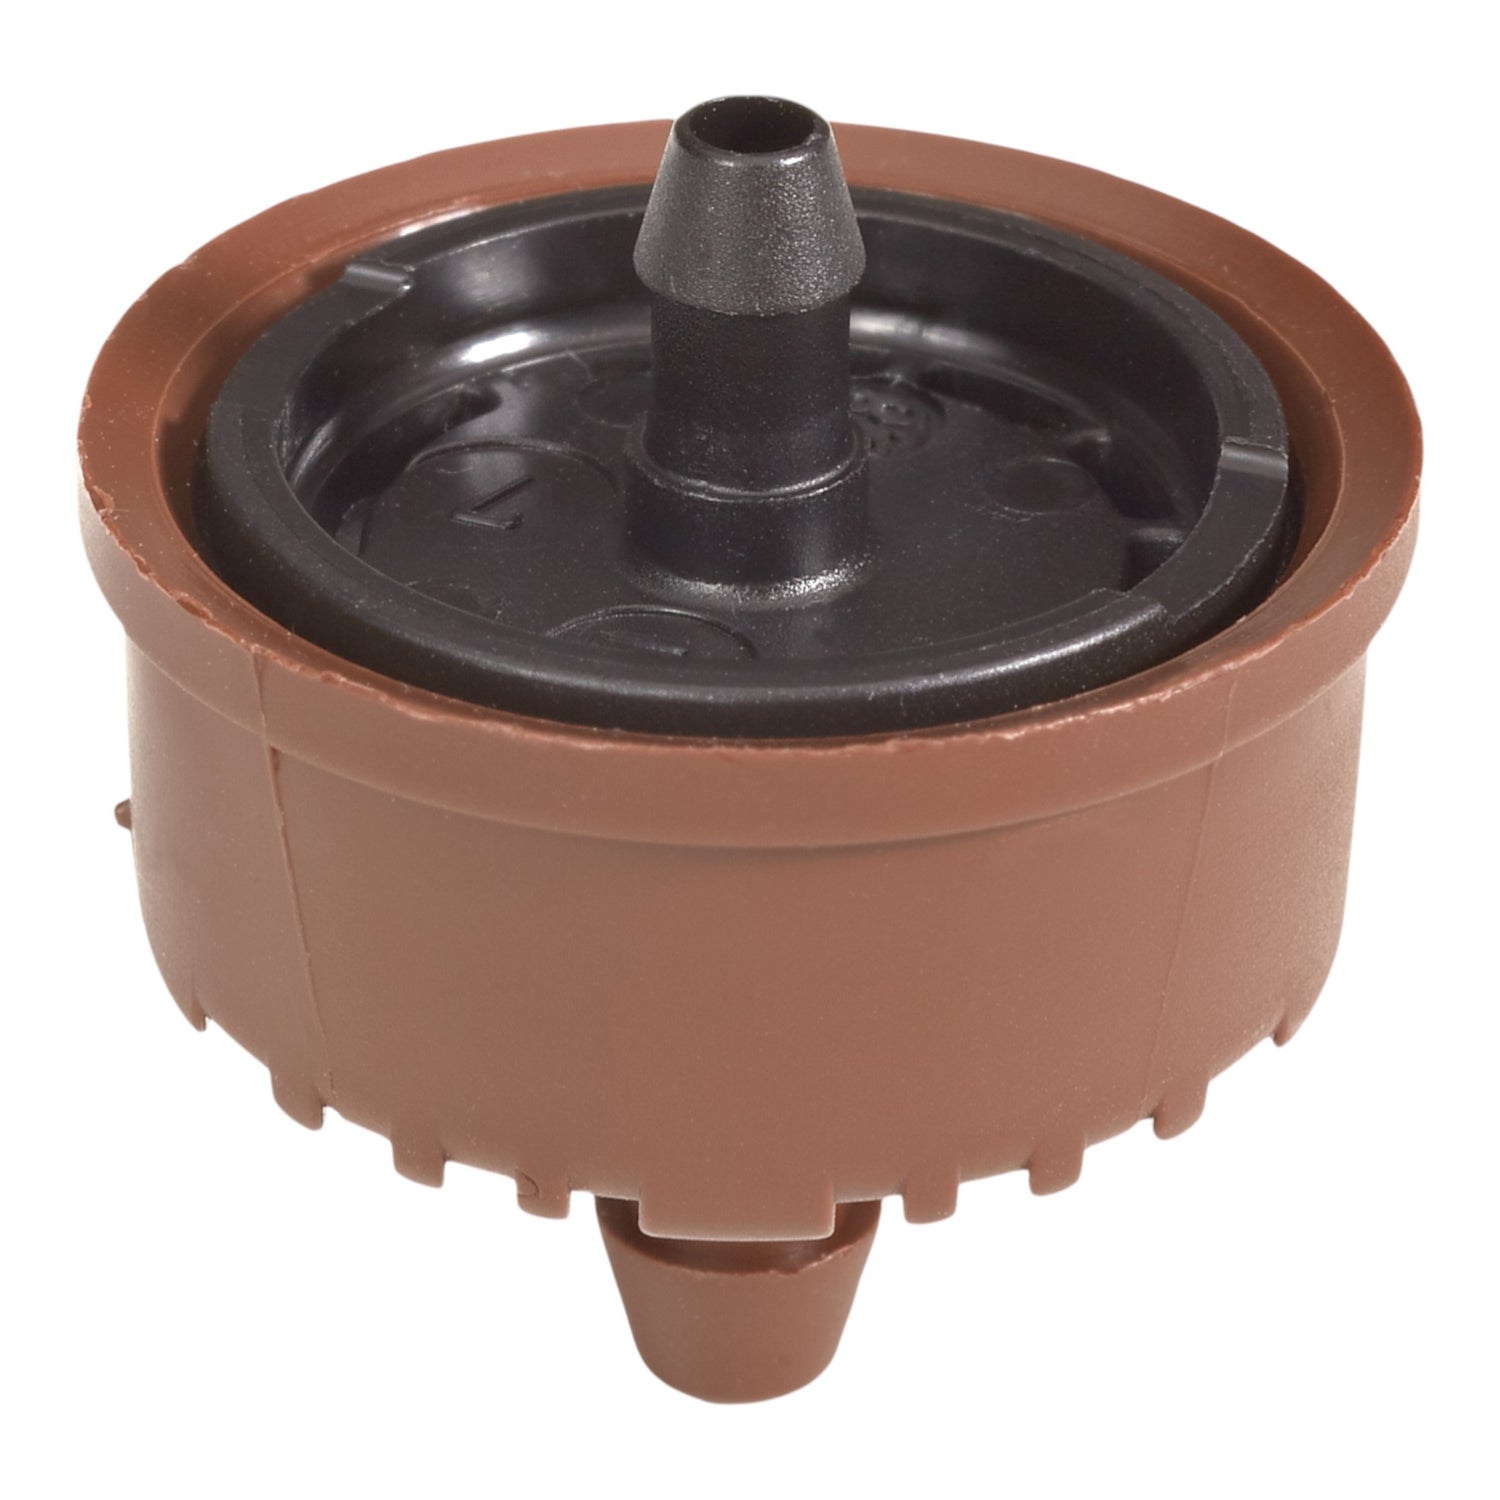
Unit price perThe Supertif Non-Drain Dripper - 7.8L/h Straight Conic Outlet is a professional irrigation dripper with a stated nominal flow of 7.8L/h and a straight conic outlet configuration.
It is intended for compatible nursery, greenhouse and container-crop irrigation systems where individual emitters are selected as part of the complete hydraulic design.
Key benefits
Selecting dripper flow rate
The stated nominal flow for this model is 7.8L/h. Select emitter flow according to crop water demand, container volume, substrate, irrigation frequency and the number of emitters serving each plant.
A higher nominal flow is not automatically better. Short irrigation events, small containers or low-retention substrates may require a different strategy from large nursery stock or longer irrigation zones.
Outlet configuration & installation
This version uses a straight conic outlet. Match the outlet to the intended microtube, stake or downstream connection and use compatible insertion tools where required. Do not force mismatched tube or fittings onto the emitter.
Route downstream tube without kinks and avoid side-loading the dripper connection. Secure stakes or outlets so water is delivered consistently to the intended root-zone position.
Non-drain irrigation behaviour
A non-drain dripper should be considered as part of the complete irrigation zone. Line drainage, elevation changes, start-up behaviour and pressure conditions can influence how quickly individual containers receive water at the beginning and end of an irrigation cycle.
Where highly uniform short pulses are required, verify actual system behaviour across representative positions rather than relying only on the emitter's nominal flow figure.
Pressure, filtration & uniformity
Emitter performance depends on suitable operating pressure and clean water. Use filtration appropriate to the water source and irrigation system and monitor pressure where necessary across longer or more complex zones.
Periodically collect and compare output from representative emitters. Differences can indicate blockage, pressure variation, damaged pipework or installation issues.
Maintenance
Flush irrigation lines according to water quality and system requirements. Inspect emitters and downstream components for blockage or damage and replace components that cannot be restored to reliable operation.
Supertif Non-Drain Dripper - 7.8L/h Straight Conic Outlet product details
| Product | Supertif Non-Drain Dripper |
|---|---|
| Nominal flow | 7.8L/h |
| Outlet | Straight Conic Outlet |
| Application | Professional nursery, greenhouse and container irrigation |
Supertif Non-Drain Dripper - 7.8L/h Straight Conic Outlet FAQs
What is the stated flow rate?
The stated nominal flow is 7.8L/h. What outlet does this version use?
This version is described as a straight conic outlet. What does non-drain mean for irrigation management?
It describes the dripper format, but actual line drainage and start/stop behaviour still depend on the complete installation, elevation and pressure conditions. Will every dripper deliver exactly the nominal flow in any system?
No. Actual delivery should be verified under the operating pressure and layout of the complete irrigation system. How do I choose the right flow rate?
Consider crop demand, container volume, substrate, irrigation frequency, zone duration and the number of emitters per plant. Is filtration important?
Yes. Suitable filtration and line maintenance help reduce emitter blockage and loss of irrigation uniformity. How can I check irrigation uniformity?
Collect and compare output from representative emitters across the zone and investigate meaningful differences. Can I use any microtube or stake with this dripper?
Confirm compatibility with the outlet configuration and downstream components before installation. What maintenance is required?
Flush lines as appropriate, inspect emitters for blockage or damage and maintain filters and upstream irrigation equipment.
£0.42
Unit price per£0.42
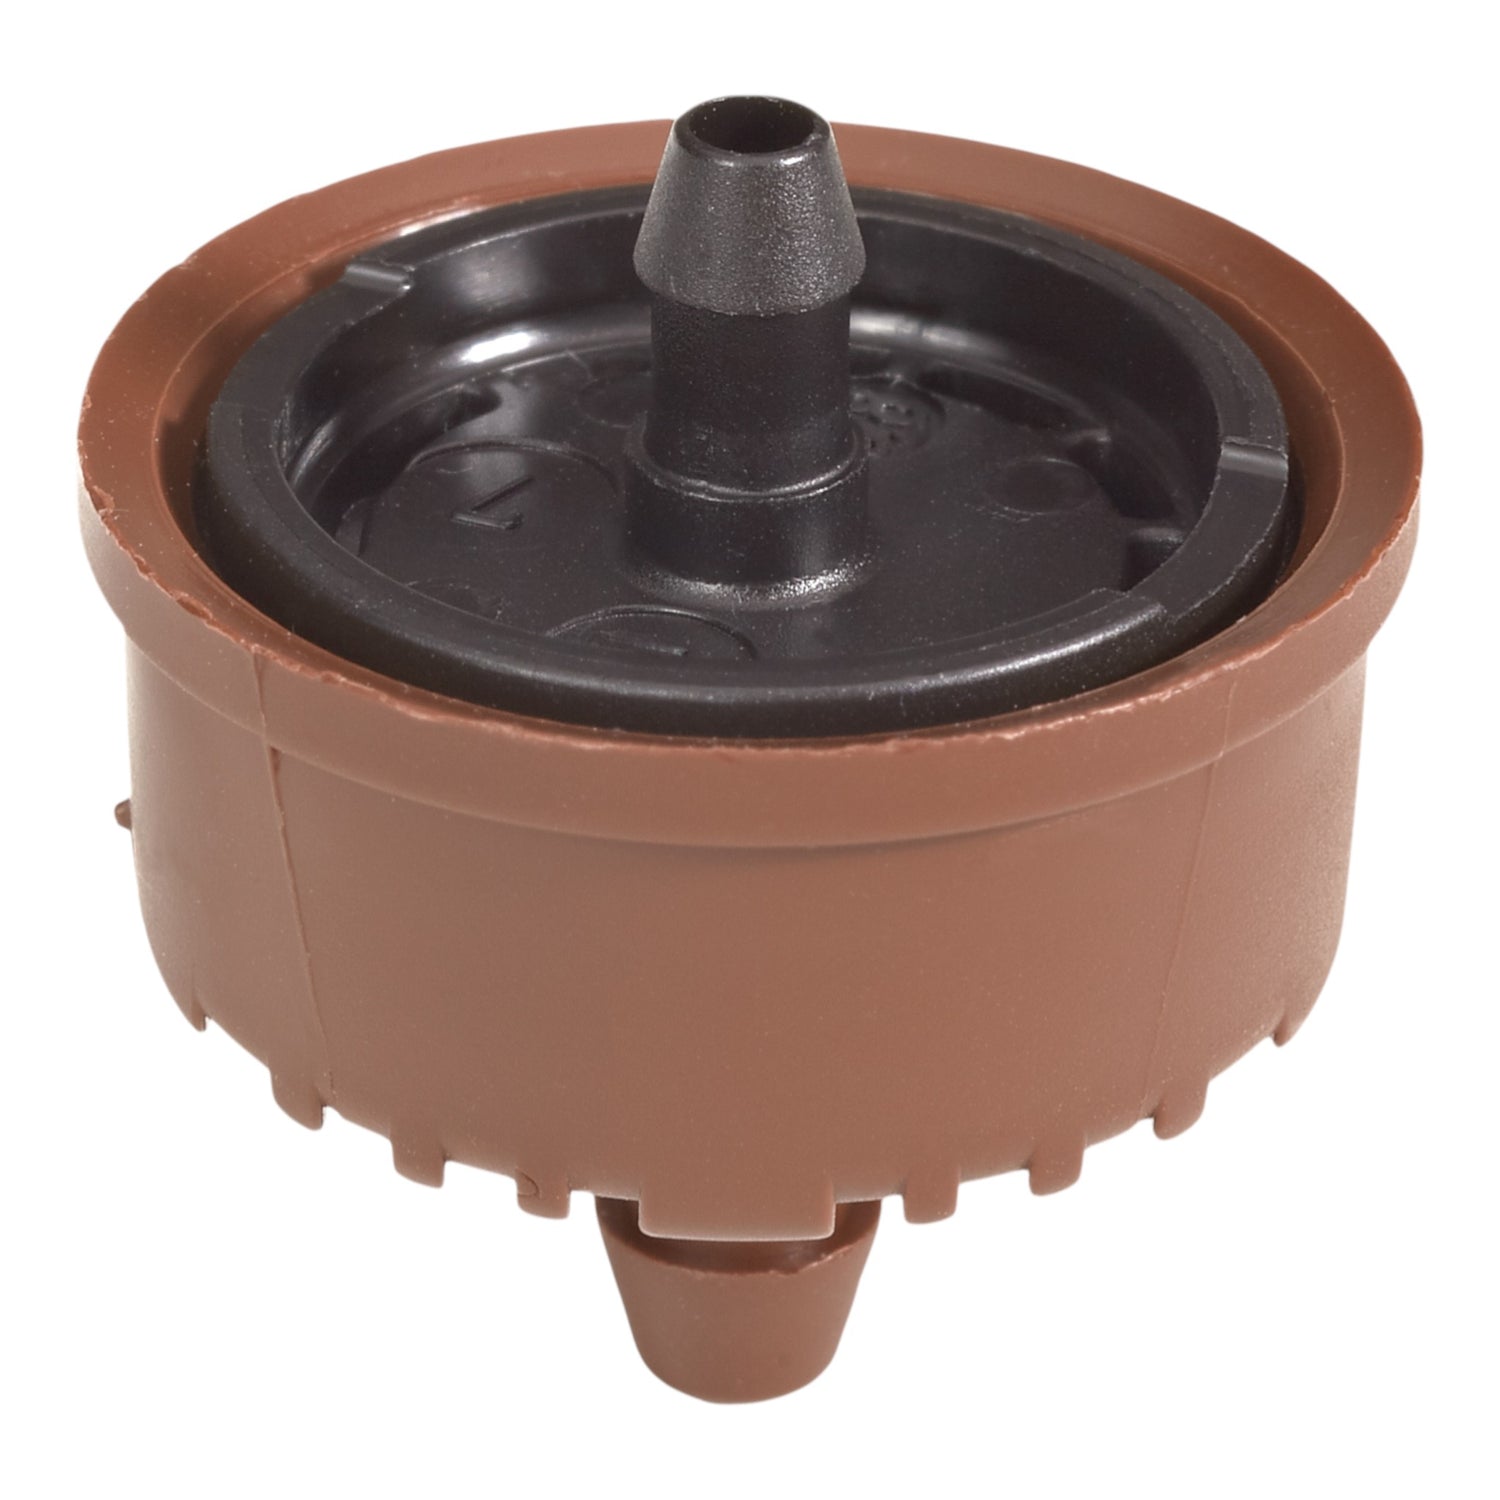
Unit price perThe Supertif Non-Drain Dripper - 3.8L/h Straight Conic Outlet is a professional irrigation dripper with a stated nominal flow of 3.8L/h and a straight conic outlet configuration.
It is intended for compatible nursery, greenhouse and container-crop irrigation systems where individual emitters are selected as part of the complete hydraulic design.
Key benefits
Selecting dripper flow rate
The stated nominal flow for this model is 3.8L/h. Select emitter flow according to crop water demand, container volume, substrate, irrigation frequency and the number of emitters serving each plant.
A higher nominal flow is not automatically better. Short irrigation events, small containers or low-retention substrates may require a different strategy from large nursery stock or longer irrigation zones.
Outlet configuration & installation
This version uses a straight conic outlet. Match the outlet to the intended microtube, stake or downstream connection and use compatible insertion tools where required. Do not force mismatched tube or fittings onto the emitter.
Route downstream tube without kinks and avoid side-loading the dripper connection. Secure stakes or outlets so water is delivered consistently to the intended root-zone position.
Non-drain irrigation behaviour
A non-drain dripper should be considered as part of the complete irrigation zone. Line drainage, elevation changes, start-up behaviour and pressure conditions can influence how quickly individual containers receive water at the beginning and end of an irrigation cycle.
Where highly uniform short pulses are required, verify actual system behaviour across representative positions rather than relying only on the emitter's nominal flow figure.
Pressure, filtration & uniformity
Emitter performance depends on suitable operating pressure and clean water. Use filtration appropriate to the water source and irrigation system and monitor pressure where necessary across longer or more complex zones.
Periodically collect and compare output from representative emitters. Differences can indicate blockage, pressure variation, damaged pipework or installation issues.
Maintenance
Flush irrigation lines according to water quality and system requirements. Inspect emitters and downstream components for blockage or damage and replace components that cannot be restored to reliable operation.
Supertif Non-Drain Dripper - 3.8L/h Straight Conic Outlet product details
| Product | Supertif Non-Drain Dripper |
|---|---|
| Nominal flow | 3.8L/h |
| Outlet | Straight Conic Outlet |
| Application | Professional nursery, greenhouse and container irrigation |
Supertif Non-Drain Dripper - 3.8L/h Straight Conic Outlet FAQs
What is the stated flow rate?
The stated nominal flow is 3.8L/h. What outlet does this version use?
This version is described as a straight conic outlet. What does non-drain mean for irrigation management?
It describes the dripper format, but actual line drainage and start/stop behaviour still depend on the complete installation, elevation and pressure conditions. Will every dripper deliver exactly the nominal flow in any system?
No. Actual delivery should be verified under the operating pressure and layout of the complete irrigation system. How do I choose the right flow rate?
Consider crop demand, container volume, substrate, irrigation frequency, zone duration and the number of emitters per plant. Is filtration important?
Yes. Suitable filtration and line maintenance help reduce emitter blockage and loss of irrigation uniformity. How can I check irrigation uniformity?
Collect and compare output from representative emitters across the zone and investigate meaningful differences. Can I use any microtube or stake with this dripper?
Confirm compatibility with the outlet configuration and downstream components before installation. What maintenance is required?
Flush lines as appropriate, inspect emitters for blockage or damage and maintain filters and upstream irrigation equipment.
£61.61
Unit price per£61.61
Unit price perThe PGV 1.5" Solenoid Irrigation Valve with Flow Control is designed for automated control of compatible professional irrigation zones.
Solenoid and pressure-regulating valves allow irrigation sections to be opened, closed or controlled as part of a correctly designed nursery, greenhouse, landscape or horticultural water system.
Key benefits
Automated irrigation-zone control
Use the valve to control a compatible irrigation zone from the appropriate controller or switching system. Size the valve and pipework for the required zone flow and available pressure, and install it in the correct flow direction.
Where flow control is provided, use it for appropriate adjustment and commissioning rather than as a substitute for correct hydraulic design.
Electrical compatibility
The stated electrical designation for this version is Controller/solenoid dependent. Confirm controller output, solenoid type and wiring requirements before connection. Do not apply an assumed voltage simply because another valve in the same irrigation system uses it.
Electrical installation in wet horticultural environments should use suitable connections and protection and should be carried out in accordance with the applicable installation requirements.
Installation & commissioning
Flush upstream pipework before final commissioning where appropriate. Install the valve with adequate access for service, support connected pipework and avoid transferring pipe strain into the valve body.
Pressurise the system gradually, check for leakage and confirm that the valve opens and closes correctly under normal controller operation.
Flow, pressure & filtration
Valve performance depends on the complete hydraulic system. Available pressure, flow demand, pipe size, elevation and downstream equipment all influence operation. Use filtration appropriate to the water source and the irrigation components being protected.
Maintenance & fault finding
If a valve fails to open, close or regulate correctly, isolate the system safely and check controller output, wiring, solenoid condition, debris, diaphragm or internal components as appropriate to the valve design. Replace damaged parts rather than forcing manual operation.
PGV 1.5" Solenoid Irrigation Valve with Flow Control product details
| Product type | PGV Solenoid Irrigation Valve |
|---|---|
| Valve size | 1.5" |
| Flow control | Yes |
| Jar-top format | No |
| Electrical designation | Controller/solenoid dependent |
| Application | Professional irrigation-zone control |
PGV 1.5" Solenoid Irrigation Valve with Flow Control FAQs
What size is this valve?
The stated valve size is 1.5". What is a solenoid irrigation valve used for?
It opens and closes an irrigation zone in response to a compatible electrical controller or switching system. Can I connect it to any irrigation controller?
No. Confirm the required solenoid voltage/type and controller output before connection. Does valve size alone determine how much water the zone can supply?
No. Available pressure, pipe sizing, valve characteristics, elevation and downstream flow demand all affect system performance. Should pipework be flushed before commissioning?
Yes where appropriate, to reduce the risk of installation debris entering the valve or downstream irrigation equipment. Is filtration important?
Yes. Suitable filtration can reduce debris-related problems in valves and downstream emitters. How should the valve be installed?
Follow the correct flow direction, support connected pipework and leave adequate access for servicing. What should I check if the valve will not open or close?
Safely check controller output, wiring, solenoid operation, water supply and internal contamination or damage as appropriate. Should the valve be leak-tested after installation?
Yes. Pressurise the system gradually and inspect the valve and connections before routine operation. Does this version include flow control?
Yes. The source product specification identifies this version as having flow control.
£3.75
Unit price per£3.75
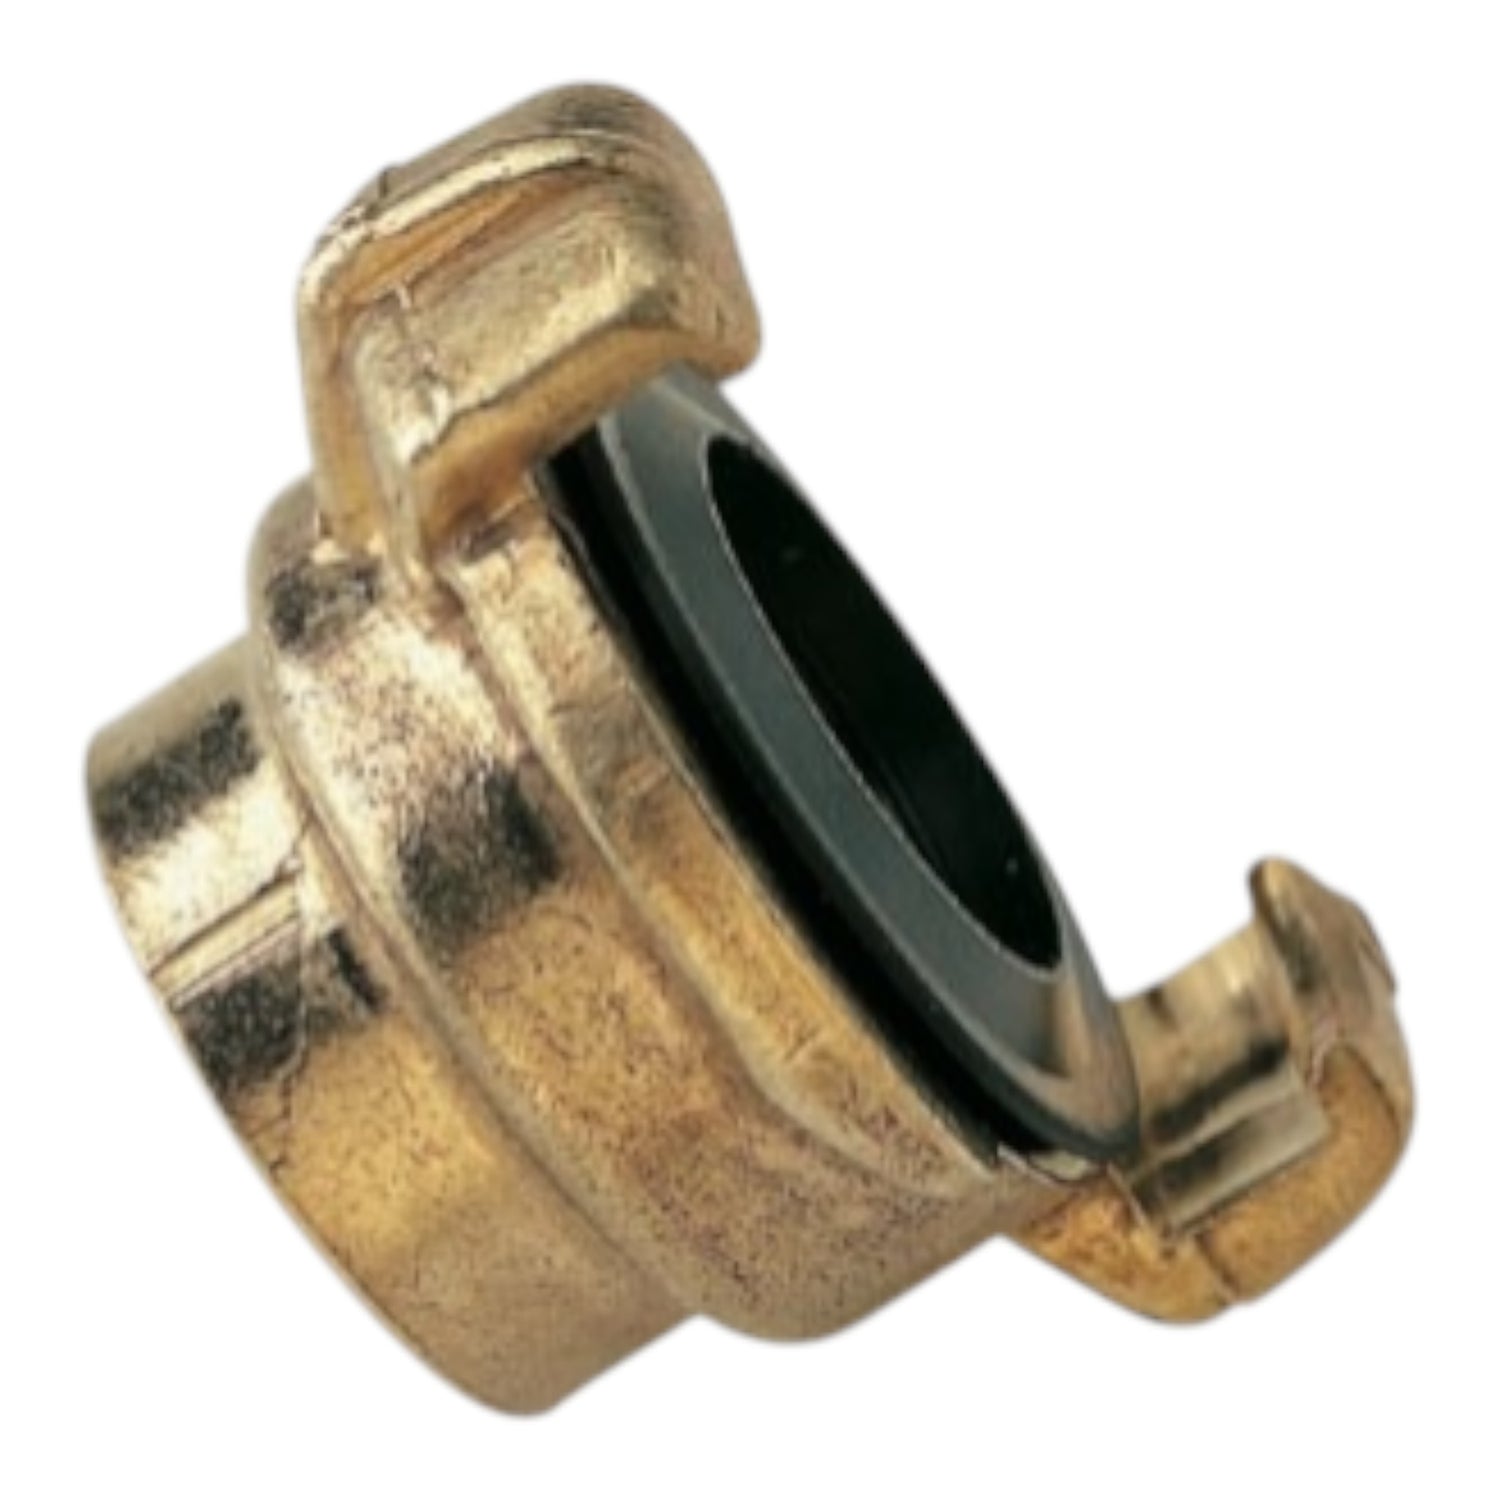
Unit price perThe Female Hose Coupling - Hose diameter 3/4" (19mm) is designed for connecting compatible hose using a female coupling in professional horticultural, nursery, landscape and garden watering systems.
Correct hose fittings and storage equipment help keep watering systems organised, serviceable and easier to move between working areas.
Key benefits
Building serviceable hose connections
Match the fitting to the stated hose diameter and coupling system. Push barbed fittings fully into compatible hose and secure them using the appropriate method for the system.
Keep sealing faces and washers clean. If a connection leaks, inspect the seal, hose end and coupling condition rather than relying on excessive tightening.
Watering-system setup
Choose hose diameter and fittings according to the required flow, run length and available water pressure. Long hose runs and restrictive fittings can reduce pressure and flow at the watering lance or outlet.
Leak checks & maintenance
Inspect hose ends, seals, couplings and moving trolley parts periodically. Replace split hose, worn seals and damaged fittings rather than accepting persistent leakage.
Storage
Store hose and fittings clean and protected from unnecessary physical damage. Avoid leaving hose tightly kinked or under tension around fittings during storage.
Female Hose Coupling - Hose diameter 3/4" (19mm) product details
| Product type | Female Hose Coupling |
|---|---|
| Primary use | connecting compatible hose using a female coupling |
| Source designation | Female Hose Coupling - Hose diameter 3/4" (19mm) |
| Application | Professional horticultural and garden watering systems |
Female Hose Coupling - Hose diameter 3/4" (19mm) FAQs
What is this product used for?
Connecting compatible hose using a female coupling. How do I check compatibility?
Match the stated hose diameter, fitting type and coupling system to the equipment already in use. Can different hose diameters use the same fitting?
Not unless the fitting is specifically designed for those sizes. Use the stated compatible diameter. What should I check if a hose connection leaks?
Inspect the hose end, seal, washer and coupling surfaces and replace damaged components. Does hose length affect water delivery?
Yes. Longer runs and restrictive fittings can contribute to pressure loss and reduced flow. How should hose equipment be stored?
Keep it clean and protected and avoid severe kinks, crushing or continuous strain on fittings. Should fittings be inspected regularly?
Yes. Check seals, coupling faces and hose connections for wear or damage. Can hose trolleys be overloaded?
Use each component only within the capacity and application appropriate to the complete watering system.
£3.83
Unit price per£3.83
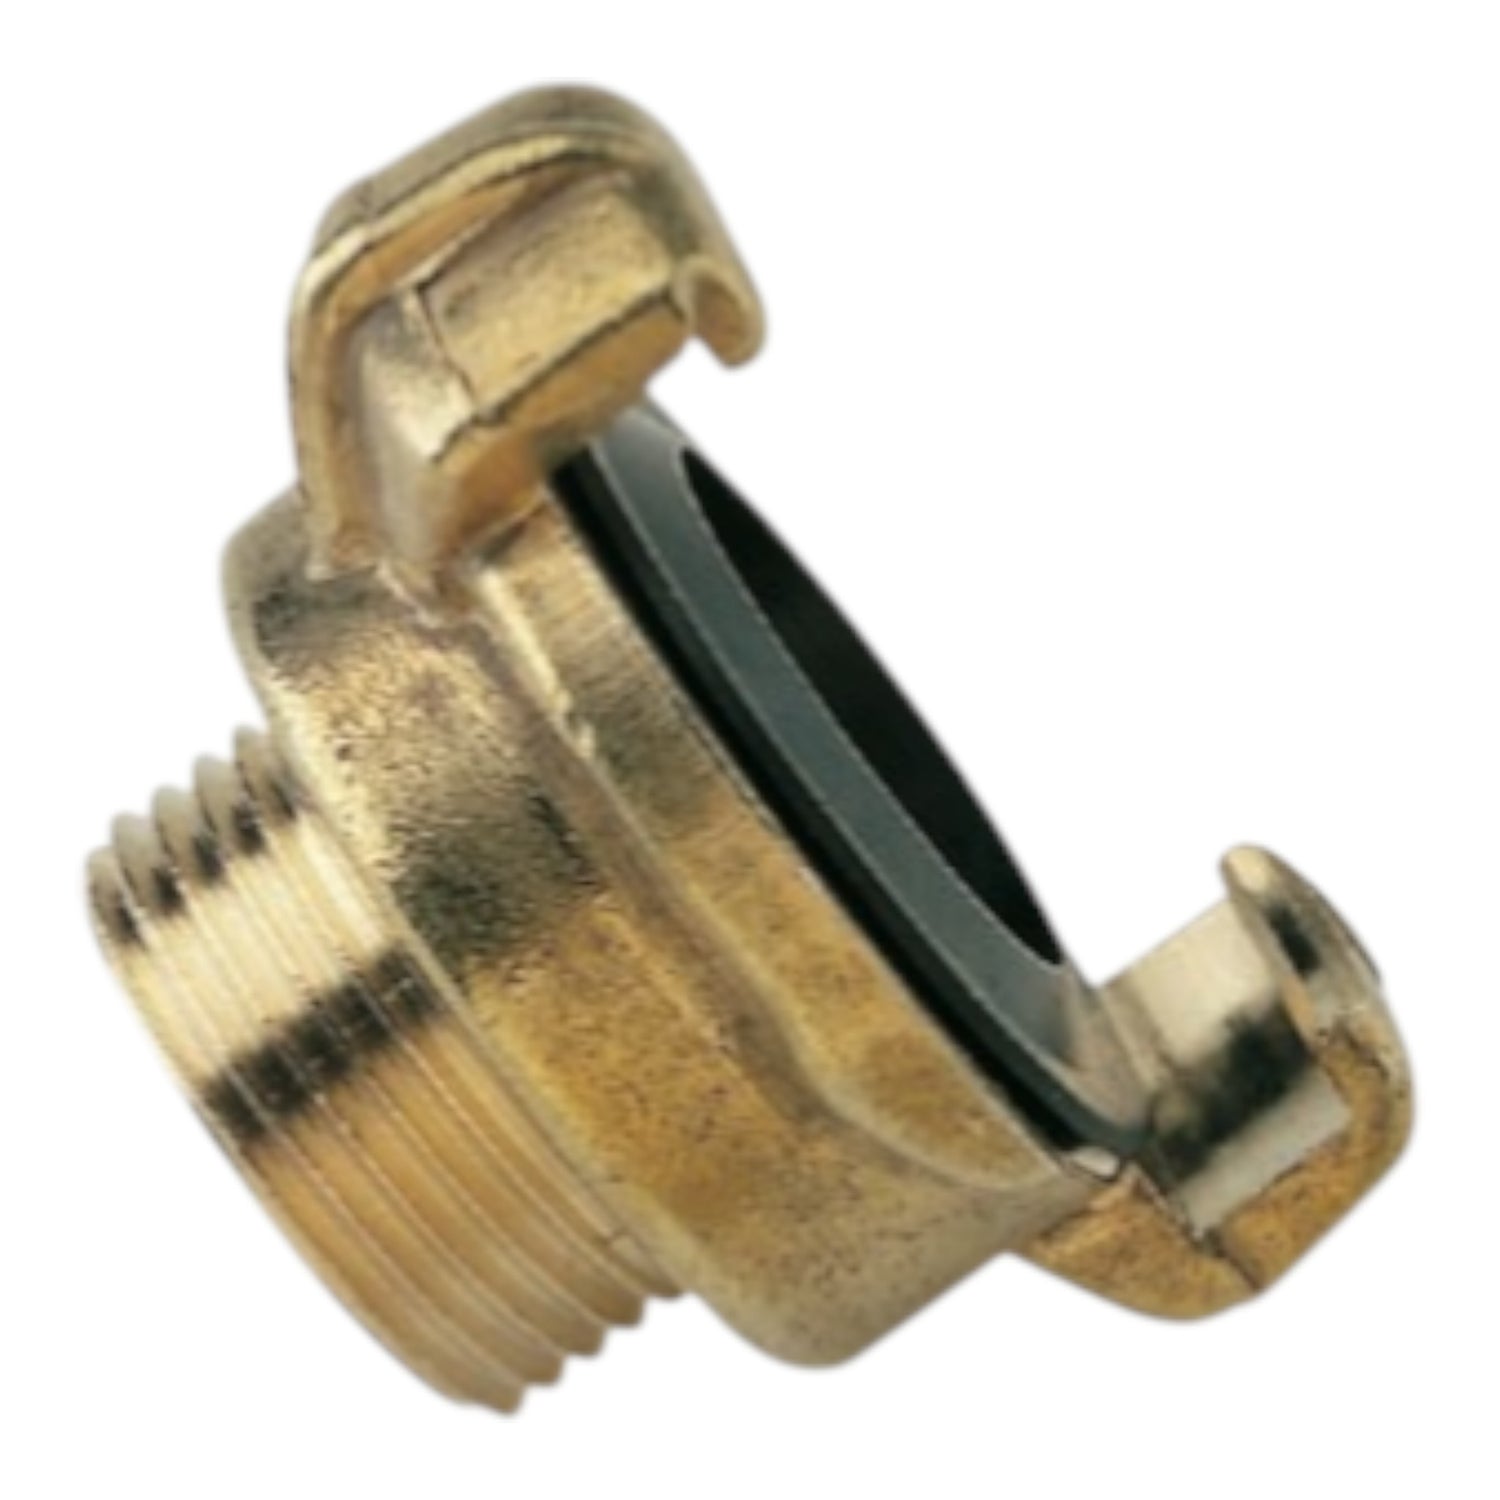
Unit price perThe Male Hose Coupling - Hose diameter 3/4" (19mm) is designed for connecting compatible hose using a male coupling in professional horticultural, nursery, landscape and garden watering systems.
Correct hose fittings and storage equipment help keep watering systems organised, serviceable and easier to move between working areas.
Key benefits
Building serviceable hose connections
Match the fitting to the stated hose diameter and coupling system. Push barbed fittings fully into compatible hose and secure them using the appropriate method for the system.
Keep sealing faces and washers clean. If a connection leaks, inspect the seal, hose end and coupling condition rather than relying on excessive tightening.
Watering-system setup
Choose hose diameter and fittings according to the required flow, run length and available water pressure. Long hose runs and restrictive fittings can reduce pressure and flow at the watering lance or outlet.
Leak checks & maintenance
Inspect hose ends, seals, couplings and moving trolley parts periodically. Replace split hose, worn seals and damaged fittings rather than accepting persistent leakage.
Storage
Store hose and fittings clean and protected from unnecessary physical damage. Avoid leaving hose tightly kinked or under tension around fittings during storage.
Male Hose Coupling - Hose diameter 3/4" (19mm) product details
| Product type | Male Hose Coupling |
|---|---|
| Primary use | connecting compatible hose using a male coupling |
| Source designation | Male Hose Coupling - Hose diameter 3/4" (19mm) |
| Application | Professional horticultural and garden watering systems |
Male Hose Coupling - Hose diameter 3/4" (19mm) FAQs
What is this product used for?
Connecting compatible hose using a male coupling. How do I check compatibility?
Match the stated hose diameter, fitting type and coupling system to the equipment already in use. Can different hose diameters use the same fitting?
Not unless the fitting is specifically designed for those sizes. Use the stated compatible diameter. What should I check if a hose connection leaks?
Inspect the hose end, seal, washer and coupling surfaces and replace damaged components. Does hose length affect water delivery?
Yes. Longer runs and restrictive fittings can contribute to pressure loss and reduced flow. How should hose equipment be stored?
Keep it clean and protected and avoid severe kinks, crushing or continuous strain on fittings. Should fittings be inspected regularly?
Yes. Check seals, coupling faces and hose connections for wear or damage. Can hose trolleys be overloaded?
Use each component only within the capacity and application appropriate to the complete watering system.
£3.70
Unit price per£3.70
Unit price perThe Male Hose Coupling - Hose diameter 1/2" (12.5mm) is designed for connecting compatible hose using a male coupling in professional horticultural, nursery, landscape and garden watering systems.
Correct hose fittings and storage equipment help keep watering systems organised, serviceable and easier to move between working areas.
Key benefits
Building serviceable hose connections
Match the fitting to the stated hose diameter and coupling system. Push barbed fittings fully into compatible hose and secure them using the appropriate method for the system.
Keep sealing faces and washers clean. If a connection leaks, inspect the seal, hose end and coupling condition rather than relying on excessive tightening.
Watering-system setup
Choose hose diameter and fittings according to the required flow, run length and available water pressure. Long hose runs and restrictive fittings can reduce pressure and flow at the watering lance or outlet.
Leak checks & maintenance
Inspect hose ends, seals, couplings and moving trolley parts periodically. Replace split hose, worn seals and damaged fittings rather than accepting persistent leakage.
Storage
Store hose and fittings clean and protected from unnecessary physical damage. Avoid leaving hose tightly kinked or under tension around fittings during storage.
Male Hose Coupling - Hose diameter 1/2" (12.5mm) product details
| Product type | Male Hose Coupling |
|---|---|
| Primary use | connecting compatible hose using a male coupling |
| Source designation | Male Hose Coupling - Hose diameter 1/2" (12.5mm) |
| Application | Professional horticultural and garden watering systems |
Male Hose Coupling - Hose diameter 1/2" (12.5mm) FAQs
What is this product used for?
Connecting compatible hose using a male coupling. How do I check compatibility?
Match the stated hose diameter, fitting type and coupling system to the equipment already in use. Can different hose diameters use the same fitting?
Not unless the fitting is specifically designed for those sizes. Use the stated compatible diameter. What should I check if a hose connection leaks?
Inspect the hose end, seal, washer and coupling surfaces and replace damaged components. Does hose length affect water delivery?
Yes. Longer runs and restrictive fittings can contribute to pressure loss and reduced flow. How should hose equipment be stored?
Keep it clean and protected and avoid severe kinks, crushing or continuous strain on fittings. Should fittings be inspected regularly?
Yes. Check seals, coupling faces and hose connections for wear or damage. Can hose trolleys be overloaded?
Use each component only within the capacity and application appropriate to the complete watering system.

Pre-cut 80cm length of 3mm dripper line for building, extending or replacing individual feed lines in horticultural irrigation systems.
This 3mm Dripper Line provides a convenient ready-cut length of irrigation tubing for delivering water or nutrient solution between compatible irrigation components. Supplied at 80cm long, there is no need to measure and cut tubing from a larger roll when setting up individual plant feeds.
Suitable for DIY hydroponic and drip irrigation systems, it is particularly useful when assembling new irrigation layouts or replacing existing 3mm dripper lines. The tubing can be used in conjunction with compatible 4mm manifold fittings.
Why choose 80cm Pre-Cut Dripper Line?
What is 3mm dripper line used for?
Dripper line is used within irrigation systems to carry water or nutrient solution towards individual plants or growing positions. It is commonly used as the smaller feed line between a manifold or other compatible irrigation fitting and the delivery point at the plant.
The pre-cut 80cm format is particularly useful when setting up multiple growing positions, as each feed starts with a consistent length of tubing. It can also be used as a replacement when an existing section of 3mm irrigation line becomes damaged or needs changing.
How to use 80cm Pre-Cut Dripper Line
Connect one end of the dripper line to the appropriate compatible irrigation fitting or manifold outlet, then route the tubing towards the required growing position. The other end can then be connected to the appropriate compatible irrigation component for your system.
Position the line so that it follows a clean route without unnecessary kinks or tight bends that could interfere with water movement. Once the irrigation system is assembled, run it and inspect the connections before leaving it in normal operation.
Product details
| Product | Pre-Cut Dripper Line |
|---|---|
| Product type | Irrigation dripper line / feed tubing |
| Length | 80cm |
| Internal diameter | 3mm |
| Colour | Black |
| Compatible fittings | 4mm manifold fittings |
| Typical applications | Hydroponic systems, drip irrigation, individual plant feeds & replacement dripper lines |
| Format | Single pre-cut length |
80cm Dripper Line FAQs
What size is this dripper line?
The tubing has a 3mm internal diameter and is supplied as an individual pre-cut 80cm length.
What is dripper line used for in an irrigation system?
Dripper line carries water or nutrient solution towards individual growing positions, allowing a main irrigation system to supply separate plants or containers.
Can this 80cm dripper line be used with a manifold?
Yes. The 3mm dripper line can be used in conjunction with compatible 4mm manifold fittings, making it useful for multi-outlet irrigation layouts.
Is the dripper line already cut to length?
Yes. Each piece is supplied pre-cut to 80cm, so there is no need to measure and cut the line from a larger roll before installation.
Can I use this as replacement dripper tubing?
Yes. The 80cm line is suitable for replacing an existing 3mm dripper line within a compatible irrigation system.
Is this suitable for hydroponic irrigation systems?
Yes. The 3mm dripper line is suitable for compatible DIY hydroponic irrigation systems as well as other drip irrigation layouts.
Does the 80cm dripper line include a dripper or stake?
No. This product is the pre-cut dripper line itself. Drippers, stakes, manifolds and other irrigation fittings are separate components unless otherwise stated.
The 6-Pot Dripper Kit is designed for small multi-pot irrigation setups in professional nursery, greenhouse and horticultural irrigation systems.
Reliable irrigation depends on matching emitters, stakes, pipework and installation tools correctly so water is delivered consistently and connections remain secure.
Key benefits
Simple multi-pot irrigation
The 6-pot starter kit provides a practical basis for distributing water to a small group of containers. Arrange the pipework so each pot can be reached cleanly without tight bends or stretched connections.
Before leaving the system unattended, run an irrigation cycle and check each outlet for delivery and leaks. Adjust irrigation duration to the crop, container volume and growing medium rather than assuming one timing suits every plant.
Irrigation system management
Good components cannot compensate for poor system design. Size pipework, zones and water supply for the required flow and pressure, and use suitable filtration where emitters or small waterways are vulnerable to debris.
Flush and inspect irrigation systems as appropriate to water quality and crop hygiene requirements.
Maintenance & storage
Inspect components periodically for blockage, wear, leaks or physical damage. Keep installation tools clean and dry between jobs and replace damaged components rather than relying on temporary fixes in production systems.
6-Pot Dripper Kit product details
| Product type | 6-Pot Dripper Kit |
|---|---|
| Primary use | small multi-pot irrigation setups |
| Application | Professional horticultural irrigation |
6-Pot Dripper Kit FAQs
What is this product used for?
Small multi-pot irrigation setups. Is it suitable for professional irrigation systems?
Yes, where the component is compatible with the pipework, emitters and system configuration being used. What should I check before installation?
Confirm component and pipe compatibility, inspect the parts for damage and plan the connection so pipework is not kinked or under unnecessary tension. Should the system be tested after fitting?
Yes. Pressurise or run the irrigation zone and check for leaks, secure connections and expected water delivery. How can I maintain irrigation uniformity?
Inspect representative outlets, maintain filtration and flushing as required and investigate blocked or damaged components promptly. Can one irrigation run time suit every crop?
No. Irrigation duration and frequency depend on crop size, container volume, substrate, weather and emitter output. How should spare components or tools be stored?
Keep them clean, dry and organised so sealing surfaces, cutting edges and small waterways are protected from damage and contamination.

Heavy duty 25mm barbed irrigation elbow for creating a secure 90° change of direction in flexible irrigation pipework.
This 25mm Heavy Duty Barbed Irrigation Elbow provides a simple way to route compatible 25mm pipe around corners without forcing the pipe itself into a tight bend. Its 90° configuration makes it particularly useful when building compact irrigation layouts or directing supply pipework neatly around a growing area.
Barbed connections at both ends grip compatible flexible pipe, making the elbow a practical fitting for hydroponic irrigation, horticultural watering systems and other water or air pipework using 25mm tubing.
Why choose a 25mm Heavy Duty Barbed Irrigation Elbow?
What is a 25mm barbed elbow used for?
A 25mm barbed elbow is used to connect two sections of compatible 25mm flexible pipe at a 90° angle. Instead of bending the irrigation pipe sharply around a corner, the elbow creates a defined change of direction while helping the pipework maintain its intended route.
It is particularly useful when constructing hydroponic irrigation systems, routing water or nutrient supply lines around equipment, or altering an existing 25mm irrigation layout.
How to use a 25mm Heavy Duty Barbed Elbow
Position the elbow where the 25mm pipework needs to change direction. Push one section of compatible 25mm flexible pipe securely over each barbed end, creating a 90° connection between the two pipe runs.
Once installed, run the irrigation system and inspect both connections. Make sure the pipe is seated securely on the barbed fitting and check the joint for leaks before returning the system to normal operation.
Product details
| Product | 25mm Heavy Duty Barbed Irrigation Elbow |
|---|---|
| Product type | Barbed irrigation elbow fitting |
| Pipe size | 25mm |
| Connections | 2 x 25mm |
| Connection style | Barbed |
| Configuration | 90° elbow |
| Construction | Heavy duty machine-moulded plastic |
| Colour | Black |
| Suitable media | Water & air |
| Typical applications | Hydroponic irrigation, horticultural watering systems & 25mm flexible pipework |
25mm Heavy Duty Barbed Irrigation Elbow FAQs
What is a 25mm barbed elbow?
It is a 90° irrigation fitting with a barbed connection at each end, allowing two sections of compatible 25mm flexible pipe to be joined at a right angle.
What size pipe does this elbow fit?
The elbow is designed for compatible 25mm irrigation pipe, including suitable 25mm flexible and LDPE pipework.
Does the elbow create a 90-degree bend?
Yes. The fitting creates a 90° change of direction in the pipe run, making it useful for routing irrigation lines neatly around corners.
Why use an elbow instead of bending 25mm irrigation pipe?
Using an elbow creates a defined 90° turn without forcing the pipe into a tight bend. This helps avoid kinking the pipe when routing an irrigation line around a corner.
Are both ends of the fitting barbed?
Yes. Both connections are barbed and designed to fit compatible 25mm flexible pipework.
Can this 25mm elbow be used in hydroponic irrigation systems?
Yes. The fitting is suitable for compatible hydroponic and horticultural irrigation systems using 25mm pipework.
Can the 25mm barbed elbow be used with water and air?
Yes. This heavy duty barbed plastic fitting is suitable for compatible water and air applications.
What is the difference between a barbed elbow and a straight connector?
A straight connector joins two sections of pipe in the same direction. A barbed elbow joins two sections while changing the direction of the pipework by 90°.

AquaKing pump adaptor for connecting compatible pumps to 13mm or 25mm irrigation hose and flexible pipework.
The AquaKing 25mm to 13mm Pump Hose Adaptor provides a straightforward way to connect compatible AquaKing pumps to two commonly used irrigation pipe sizes. It is designed to accommodate 13mm or 25mm internal-diameter tubing, giving growers greater flexibility when incorporating an AquaKing pump into an irrigation or nutrient delivery system.
A useful AquaKing pump accessory for new installations, system alterations and replacement fittings, the adaptor allows the pump outlet to be connected to the required hose size without having to redesign the surrounding irrigation pipework.
Why choose the AquaKing 25mm to 13mm Pump Hose Adaptor?
What is the AquaKing 25mm to 13mm Adaptor used for?
This adaptor is used to connect compatible AquaKing water pumps to either 13mm or 25mm internal-diameter hose. It provides the transition between the pump outlet and the irrigation pipework carrying water or nutrient solution around the growing system.
It is particularly useful in hydroponic and horticultural irrigation installations where AquaKing pumps are being connected to commonly used flexible pipe sizes.
How to fit the AquaKing Pump Hose Adaptor
Fit the adaptor securely onto the compatible AquaKing pump outlet, then connect the appropriate 13mm or 25mm internal-diameter hose to the corresponding connection on the adaptor.
Make sure the adaptor and pipework are seated securely before operating the pump. Once installed, run the system and inspect the connection to make sure the hose remains securely positioned and water is being delivered correctly.
Product details
| Brand | AquaKing |
|---|---|
| Product | Pump Hose Adaptor |
| Product type | Water pump hose adaptor |
| Hose sizes | 13mm & 25mm internal diameter |
| 13mm connection | Suitable for 13mm internal-diameter hose |
| 25mm connection | Suitable for 25mm internal-diameter hose |
| Compatibility | Compatible AquaKing water pumps |
| Typical applications | Hydroponic irrigation, horticultural watering systems & nutrient delivery pipework |
| Manufacturer SKU | ES-8097 |
AquaKing 25mm to 13mm Pump Adaptor FAQs
What is the AquaKing 25mm to 13mm Adaptor used for?
The adaptor is used to connect compatible AquaKing water pumps to different sizes of irrigation hose, allowing the pump to work with 13mm or 25mm internal-diameter pipework.
What size hose does the AquaKing Pump Adaptor fit?
The adaptor is designed for use with 13mm and 25mm internal-diameter hose, giving growers a choice between two commonly used irrigation pipe sizes.
Can I connect 13mm irrigation hose to an AquaKing pump?
Yes. This adaptor allows compatible AquaKing pumps to be connected to 13mm internal-diameter hose.
Can the adaptor be used with 25mm irrigation pipe?
Yes. The adaptor also accommodates 25mm internal-diameter pipework for systems using a larger irrigation line.
Is 13mm hose the same size as standard garden hose?
13mm internal-diameter tubing corresponds to a commonly used standard garden hose size, making the adaptor useful where this size of flexible pipe is being incorporated into an irrigation system.
Is this an AquaKing pump replacement adaptor?
Yes. It can be used as a replacement AquaKing hose adaptor where the existing fitting has been lost or damaged, as well as for new irrigation installations.
Does this product include an AquaKing pump?
No. This product is the 25mm to 13mm hose adaptor only. The AquaKing water pump and irrigation hose are separate components.

16mm irrigation tee with a reducing side outlet for connecting 3mm internal-diameter dripper line to a 16mm main irrigation supply.
This 16mm x 3mm Dripper Line Tee Connector provides a simple way to branch an individual dripper feed from a larger irrigation supply line. The two 16mm connections sit inline with the main pipework, while the smaller side connection accepts compatible dripper line with a 3mm internal diameter.
It is a useful fitting for building hydroponic and horticultural drip irrigation systems, allowing water or nutrient solution to travel through the main 16mm supply pipe before being directed towards individual growing positions through smaller dripper lines.
Why choose a 16mm x 3mm Dripper Line Tee Connector?
What is a 16mm x 3mm dripper line tee used for?
The tee is used to take an individual dripper feed from a 16mm main irrigation line. Water or nutrient solution continues through the larger pipework while the reducing side connection allows a smaller dripper line to branch towards an individual pot, plant or growing position.
This makes the fitting particularly useful when constructing drip irrigation layouts with a 16mm supply line and separate 3mm internal-diameter dripper lines feeding individual plants.
How to use a 16mm x 3mm Dripper Line Tee Connector
Install the tee inline with the compatible 16mm irrigation supply pipe, using the two larger connections to continue the main line through the growing area. Connect compatible 3mm internal-diameter dripper line to the smaller side outlet and route it towards the required growing position.
Position the dripper line without unnecessary kinks or tight bends. Once the irrigation system has been assembled, run the pump and inspect the connection points to make sure the pipework is securely fitted and water is reaching the required feed points.
Product details
| Product | 16mm x 3mm Dripper Line Tee Connector |
|---|---|
| Product type | Reducing irrigation tee connector |
| Main line connection | 16mm |
| Dripper line connection | For 3mm internal-diameter dripper line |
| Configuration | Inline tee with reducing dripper line outlet |
| Colour | Black |
| Typical applications | Drip irrigation, hydroponic watering systems & individual plant feed lines |
16mm x 3mm Dripper Line Tee FAQs
What is a 16mm x 3mm dripper line tee?
It is an irrigation fitting designed to sit inline with 16mm supply pipe while providing a smaller side connection for compatible dripper line with a 3mm internal diameter.
What size dripper line does this tee connector take?
The smaller side connection is intended for compatible dripper line with a 3mm internal diameter.
Does this fitting connect to 16mm irrigation pipe?
Yes. The two larger connections allow the tee to sit inline with compatible 16mm irrigation pipework.
What is the smaller outlet on the irrigation tee for?
The smaller connection allows a dripper line to branch away from the main 16mm supply pipe and carry water or nutrient solution towards an individual growing position.
Can this tee be used with the 80cm Pre-Cut Dripper Line?
Yes. The fitting is suitable for connecting compatible dripper line with a 3mm internal diameter, including the 80cm pre-cut 3mm ID dripper line used within this irrigation range.
Can this fitting be used in hydroponic irrigation systems?
Yes. It is suitable for compatible hydroponic and horticultural drip irrigation systems using a 16mm main supply line with smaller dripper feeds running to individual growing positions.
Does this tee split the 16mm pipe into three 16mm lines?
No. This is a reducing tee rather than a standard three-way 16mm tee. The main irrigation supply runs through the two 16mm connections, while the smaller side connection is used for 3mm internal-diameter dripper line.
Can I use several of these tees along one 16mm irrigation line?
Yes. Multiple tee connectors can be positioned along a compatible 16mm irrigation layout to create separate dripper feeds for multiple growing positions. The overall irrigation system still needs to be appropriately sized for the number of outlets being supplied.

16mm irrigation elbow connector for joining two sections of compatible pipe and creating a neat 90° change of direction.
This 16mm Irrigation Elbow Connector provides a simple way to route irrigation pipework around corners and changes in direction. The two barbed connections join compatible 16mm irrigation pipe, allowing the supply line to turn through approximately 90° without having to force the pipe around a tight bend.
Ideal for hydroponic and horticultural irrigation layouts, the elbow can be used when building a new watering system, altering existing pipework or replacing an existing 16mm elbow fitting.
Why choose a 16mm Irrigation Elbow Connector?
What is a 16mm irrigation elbow used for?
A 16mm irrigation elbow is used to connect two sections of compatible 16mm irrigation pipe while changing the direction of the supply line. Rather than bending flexible pipe tightly around a corner, the elbow creates a defined turn in the irrigation layout.
It is useful for routing supply pipe around growing areas, reservoirs, benches and other equipment, as well as creating tidy irrigation layouts where the direction of the main line needs to change.
How to use a 16mm Irrigation Elbow Connector
Position the elbow where the 16mm irrigation line needs to change direction. Connect one section of compatible 16mm pipe to each barbed end, pushing the pipe securely onto the fitting to create the required elbow in the supply line.
Once the irrigation layout has been assembled, run the system and inspect both connections to make sure the pipework remains securely positioned and there are no leaks around the fitting.
Product details
| Product | 16mm Irrigation Elbow Connector |
|---|---|
| Product type | Irrigation elbow fitting |
| Pipe size | 16mm |
| Connections | 2 x 16mm |
| Connection style | Barbed |
| Configuration | 90° elbow |
| Colour | Black |
| Typical applications | Hydroponic irrigation, horticultural watering systems & 16mm supply pipework |
16mm Irrigation Elbow Connector FAQs
What is a 16mm irrigation elbow used for?
A 16mm irrigation elbow joins two sections of compatible 16mm irrigation pipe while allowing the pipework to change direction through approximately 90°.
What size pipe does this irrigation elbow fit?
Both ends of the connector are designed for compatible 16mm irrigation pipework.
Does the 16mm elbow create a 90° bend?
Yes. The elbow configuration allows the irrigation line to change direction through approximately 90°, making it useful when routing pipework around corners.
Why use an elbow instead of bending 16mm irrigation pipe?
An elbow provides a defined change of direction without requiring the irrigation pipe itself to be forced around a tight bend. This helps create a neater pipe layout and reduces the risk of restricting the line through an excessively tight bend.
Does the 16mm Irrigation Elbow have barbed connections?
Yes. The fitting has barbed ends designed to connect to compatible flexible 16mm irrigation pipe.
Can this elbow be used in hydroponic irrigation systems?
Yes. The connector is suitable for compatible hydroponic and horticultural irrigation layouts that use 16mm pipework.
Can I use several 16mm elbows in one irrigation system?
Yes. Multiple elbow connectors can be incorporated where the 16mm irrigation line needs to change direction at different points around the growing area.
Is this the same as a 16mm tee connector?
No. A 16mm elbow connects two sections of pipe and changes the direction of the line. A tee connector creates an additional branch from the irrigation supply.

16mm straight irrigation connector for joining, extending or repairing compatible 16mm supply pipework.
This 16mm Irrigation Straight Connector provides a simple way to join two lengths of compatible 16mm irrigation pipe in a continuous straight run. Its double-barbed design creates a connection point between the two sections of pipe, making it a useful fitting for both new irrigation installations and existing systems.
Use it to extend a 16mm supply line, connect separate lengths of pipe or replace a damaged section without having to replace a longer run of irrigation tubing. It is a straightforward component for hydroponic, greenhouse and general horticultural watering systems using compatible 16mm pipework.
Why choose a 16mm Irrigation Straight Connector?
What is a 16mm irrigation straight connector used for?
A 16mm straight connector, sometimes called a 16mm coupling or joiner, is used to connect two lengths of compatible 16mm irrigation pipe. Unlike an elbow or tee, it keeps the pipework running in the same direction without creating a bend or additional branch.
This makes it useful for extending irrigation supply lines, joining separate lengths of pipe and carrying out straightforward repairs. If a section of 16mm pipe becomes damaged, the affected area can be removed and a straight connector used as part of the repair.
How to use a 16mm Irrigation Straight Connector
Position the connector between the two lengths of compatible 16mm irrigation pipe that need to be joined. Push one pipe securely onto each barbed end so that the two sections form a continuous straight irrigation line.
Once the system is assembled, run the irrigation supply and inspect both sides of the connection. Make sure the pipework remains securely seated on the fitting and check for leaks before returning the system to normal operation.
Product details
| Product | 16mm Irrigation Straight Connector |
|---|---|
| Alternative names | 16mm coupling / 16mm straight joiner |
| Product type | Straight irrigation pipe connector |
| Pipe size | 16mm |
| Connections | 2 x 16mm |
| Connection style | Double barbed |
| Configuration | Straight |
| Colour | Black |
| Typical applications | Joining, extending & repairing compatible 16mm irrigation pipework |
16mm Irrigation Straight Connector FAQs
What is a 16mm irrigation straight connector?
It is a straight fitting used to join two lengths of compatible 16mm irrigation pipe together, creating a continuous run of pipework.
Is a 16mm straight connector the same as a 16mm coupling?
Yes. In horticultural irrigation, the terms straight connector, coupling and straight joiner are commonly used for fittings that connect two sections of irrigation pipe in a straight line.
What size pipe does this connector fit?
The connector is designed to join two sections of compatible 16mm irrigation pipework.
Can I use a 16mm straight connector to extend irrigation pipe?
Yes. Extending a 16mm irrigation line is one of the main uses for a straight connector. It allows another section of compatible 16mm pipe to be joined to the existing run.
Can a 16mm coupling be used to repair irrigation pipe?
Yes. Where an appropriate damaged section can be removed, a straight connector can be used to reconnect compatible 16mm pipework as part of the repair.
Does this 16mm connector have barbed ends?
Yes. The connector has a barbed connection at each end for joining compatible flexible 16mm irrigation pipe.
Can this connector be used in hydroponic irrigation systems?
Yes. It is suitable for compatible hydroponic and horticultural irrigation systems that use 16mm supply pipework.
What is the difference between a 16mm coupling, elbow and tee?
A straight coupling joins two lengths of 16mm pipe in the same direction. An elbow changes the direction of the pipework, while a tee creates an additional branch in the irrigation line.

Three-way 16mm irrigation tee connector for branching compatible 16mm supply pipework around hydroponic and horticultural watering systems.
This 16mm Irrigation Tee Connector joins three sections of compatible 16mm irrigation pipe, allowing a single supply line to split into two directions. With three equal barbed connections, it provides a simple way to create branches within an irrigation layout while keeping the same pipe size throughout.
Use it when building a new irrigation system, extending existing pipework or introducing an additional 16mm branch to supply another section of the growing area. It is a useful core fitting for hydroponic, greenhouse and general horticultural irrigation systems using 16mm pipework.
Why choose a 16mm Irrigation Tee Connector?
What is a 16mm irrigation tee used for?
A 16mm irrigation tee is used when a 16mm supply line needs to branch in another direction. Three equal connections allow compatible 16mm pipe to enter the fitting and continue through two separate outlets, creating a T-shaped junction within the irrigation system.
This makes the fitting useful for distributing water or nutrient solution around larger growing areas, connecting different sections of an irrigation layout and adding additional 16mm supply lines without changing pipe size.
How to use a 16mm Irrigation Tee Connector
Position the tee at the point where the 16mm irrigation pipework needs to branch. Connect compatible 16mm pipe to each required barbed connection, pushing the pipe securely onto the fitting.
Route the two outgoing pipe runs towards the required areas of the irrigation system. Once everything is assembled, run the system and inspect all three connections to make sure the pipework remains securely fitted and there are no leaks.
Product details
| Product | 16mm Irrigation Tee Connector |
|---|---|
| Product type | Three-way irrigation tee fitting |
| Pipe size | 16mm |
| Connections | 3 x 16mm |
| Connection style | Barbed |
| Configuration | Equal three-way tee |
| Colour | Black |
| Typical applications | Branching hydroponic, horticultural & drip irrigation supply pipework |
16mm Irrigation Tee Connector FAQs
What is a 16mm irrigation tee connector?
It is a three-way irrigation fitting used to join three sections of compatible 16mm pipe and create a branch within the supply line.
Are all three connections 16mm?
Yes. This is an equal tee with three 16mm connections, so the same compatible 16mm irrigation pipe can be used on each side of the fitting.
What size irrigation pipe does this tee fit?
The tee is designed for compatible 16mm irrigation pipework, with a 16mm connection on all three sides.
Can I use a 16mm tee to split an irrigation line?
Yes. That is the main purpose of the fitting. It allows one 16mm irrigation line to branch into two separate 16mm pipe runs.
Does this irrigation tee have barbed connections?
Yes. All three connections are barbed for use with compatible flexible 16mm irrigation pipe.
Can this tee be used in hydroponic irrigation systems?
Yes. It is suitable for compatible hydroponic and horticultural irrigation systems using 16mm supply pipework.
What is the difference between this tee and the 16mm x 3mm Dripper Line Tee?
This fitting has three equal 16mm connections and is designed to branch the main 16mm supply pipe. The 16mm x 3mm Dripper Line Tee has a smaller side connection designed for compatible dripper line with a 3mm internal diameter.
What is the difference between a 16mm tee and a straight connector?
A 16mm straight connector joins two lengths of pipe in one continuous run. A 16mm tee has three connections and introduces an additional branch into the irrigation layout.
Can I use multiple 16mm tees in one irrigation system?
Yes. Multiple tees can be used to create additional 16mm branches where required. The pump, pipework and overall irrigation layout should be appropriately sized for the number of outlets and branches being supplied.

13mm (½") female threaded tap connector for adding a male quick-connect hose outlet to compatible irrigation and watering fittings.
This 13mm Female Threaded Tap Connector provides a convenient connection between compatible female-threaded watering points and standard quick-connect hose fittings. The threaded end screws onto a corresponding male connection, while the opposite end provides a male click-on outlet for a compatible female hose connector.
Compact and easy to incorporate into a watering setup, it is a useful irrigation accessory for connecting hose systems to compatible threaded outlets, fittings and other water-supply components.
Why choose a 13mm Female Threaded Tap Connector?
What is a 13mm female threaded tap connector used for?
This connector is used where a female threaded fitting is required on one side and a male quick-connect hose outlet is needed on the other. Once fitted to a compatible male threaded connection, a corresponding female click-on hose connector can be attached to the outlet.
It is particularly useful for horticultural irrigation and general watering setups where threaded components need to interface with convenient quick-connect hose fittings.
How to use a 13mm Female Threaded Tap Connector
Screw the female threaded end onto the corresponding compatible male threaded connection and secure it appropriately. The male quick-connect outlet can then be connected to a compatible female click-on hose fitting.
Once installed, turn on the water supply and inspect the threaded and quick-connect joints to make sure they are securely fitted and operating without leaks.
Product details
| Product | Female Threaded Tap Connector |
|---|---|
| Product type | Threaded irrigation & hose adaptor |
| Thread size | 13mm (½") |
| Thread connection | Female |
| Outlet connection | Male quick-connect |
| Configuration | Female thread to male quick-connect |
| Colour | Green |
| Typical applications | Horticultural irrigation, watering systems & quick-connect hose setups |
13mm Female Threaded Tap Connector FAQs
What is a female threaded tap connector?
It is an adaptor that screws onto a compatible male threaded fitting and provides a male quick-connect outlet for connecting compatible hose fittings.
What size is this threaded hose connector?
This version is the 13mm (½") size.
Is the threaded connection male or female?
The threaded side of this connector is female, so it is designed to screw onto a corresponding compatible male threaded connection.
What is the connection on the other end?
The opposite end provides a male quick-connect outlet designed to accept a compatible female click-on hose connector.
Does 13mm mean this connector takes 13mm hose directly?
No. On this fitting, 13mm refers to the threaded connection size rather than a barbed connection for inserting directly into 13mm hose. The opposite end is a male quick-connect hose fitting.
Can this connector be used for horticultural irrigation?
Yes. It is useful in compatible horticultural irrigation and watering systems where a threaded fitting needs to connect to quick-connect hose equipment.
Can I leave the threaded adaptor fitted and disconnect the hose?
Yes. The quick-connect end allows a compatible female hose connector to be disconnected while the threaded adaptor remains fitted to the water or irrigation connection.
Is this the same as a 13mm barbed hose connector?
No. A 13mm barbed connector is designed to connect directly to compatible hose or irrigation pipe. This fitting combines a female threaded connection with a male quick-connect hose outlet.

Five-way IWS Pro dripper manifold for branching individual dripper lines from a 13mm irrigation supply pipe.
The IWS Pro 5-Way Dripper Manifold 13mm provides five separate outlets from a 13mm irrigation supply, making it easy to distribute water or nutrient solution to multiple growing positions from one main line.
Designed for use with 13mm flexi pipe, the manifold is a practical component for IWS Pro dripper systems as well as compatible horticultural irrigation layouts. It can be used when building a new dripper setup, expanding an existing irrigation system or replacing a manifold already in service.
Why choose the IWS Pro 5-Way Dripper Manifold?
What is the IWS Pro 5-Way Dripper Manifold used for?
The manifold is used to divide the water or nutrient supply from a 13mm irrigation line into five separate dripper feeds. Each outlet can supply an individual dripper line, allowing the main irrigation supply to be distributed across multiple pots or growing positions.
This makes the manifold particularly useful when constructing multi-pot drip irrigation systems where a larger supply pipe carries the feed around the growing area and smaller dripper lines complete the final run to each plant.
How to use the IWS Pro 5-Way Dripper Manifold
Connect the manifold to compatible 13mm flexi pipe at the required point in the irrigation layout. Connect the individual dripper lines to the five manifold outlets and route each line towards its required growing position.
Once the pipework and drippers are installed, run the irrigation system and inspect the manifold and connected lines. Make sure each connection remains securely fitted and that water or nutrient solution is reaching the required dripper positions.
Product details
| Brand / range | IWS Pro |
|---|---|
| Product | 5-Way Dripper Manifold |
| Product type | Multi-outlet irrigation manifold |
| Main pipe size | 13mm |
| Dripper outlets | 5 |
| Main pipe compatibility | 13mm flexi irrigation pipe |
| Typical applications | IWS Pro dripper systems, hydroponic irrigation & multi-pot watering systems |
IWS Pro 5-Way Dripper Manifold FAQs
What does the IWS Pro 5-Way Dripper Manifold do?
The manifold takes the irrigation supply from a compatible 13mm main line and provides five separate outlets for dripper lines, allowing the supply to be distributed to multiple growing positions.
How many dripper outlets does the manifold have?
It has five dripper outlets, allowing up to five individual dripper lines to be connected to the manifold.
What size main irrigation pipe does the manifold use?
The manifold is designed for use with compatible 13mm flexi irrigation pipe.
Can I use the manifold in an IWS Pro dripper system?
Yes. This is an IWS Pro dripper manifold and is designed for use within compatible IWS Pro irrigation layouts.
Does the manifold come with drippers?
No. This product is the five-way manifold fitting itself. Dripper lines, drippers and the other irrigation components are separate parts of the system.
Where does the dripper manifold go in the irrigation system?
The manifold connects to the 13mm supply pipe at the required point in the irrigation layout. The individual dripper lines then run from the manifold outlets towards the pots or growing positions being supplied.
Can the IWS Pro 5-Way Manifold be used for automated watering?
Yes. It can form part of a compatible pump-fed irrigation setup, distributing water or nutrient solution from the main supply line to individual dripper feeds.
What is the difference between a 4-way and 5-way dripper manifold?
The difference is the number of dripper outlets. A 5-way manifold provides five individual outlets, while the 4-way version provides four.
Can I use more than one dripper manifold in an irrigation system?
Yes. Multiple manifolds can be incorporated into a suitably designed irrigation system to create additional dripper feeds across more growing positions.

Barbed irrigation reducer for joining 25mm and 19mm pipe in one straightforward inline connection.
This 25mm to 19mm Barbed Irrigation Reducer provides a simple way to change between two commonly used irrigation pipe sizes. With a 25mm connection at one end and a 19mm connection at the other, it allows different diameter pipework to be joined within the same irrigation system.
The straight inline design makes it useful when stepping a larger 25mm supply line down to 19mm pipework. Barbed connections provide a secure push-fit connection with compatible irrigation pipe, making the reducer suitable for new installations, system alterations and replacement work.
Why choose a 25mm to 19mm Barbed Irrigation Reducer?
What is a 25mm to 19mm irrigation reducer used for?
A 25mm to 19mm reducer is used where two different irrigation pipe sizes need to be connected. It creates a direct transition between compatible 25mm and 19mm pipework while keeping the irrigation line running in the same direction.
This is particularly useful when a larger 25mm main supply needs to transition to 19mm distribution pipework elsewhere in a hydroponic, greenhouse or horticultural irrigation system.
How to use a 25mm to 19mm Barbed Irrigation Reducer
Position the reducer where the irrigation pipe needs to change size. Connect the compatible 25mm pipe to the larger barbed end and the compatible 19mm pipe to the smaller barbed end, pushing each section securely onto the fitting.
Once installed, run the irrigation system and inspect both connections. Make sure the pipework remains securely seated on the fitting and check for leaks before returning the system to normal operation.
Product details
| Product | 25mm to 19mm Barbed Irrigation Reducer |
|---|---|
| Alternative name | Reducer joiner |
| Product type | Straight irrigation reducing connector |
| Large connection | 25mm |
| Small connection | 19mm |
| Connection style | Barbed |
| Configuration | Straight inline reducer |
| Typical applications | Hydroponic irrigation, horticultural watering systems & reducing 25mm pipework to 19mm |
25mm to 19mm Barbed Irrigation Reducer FAQs
What does a 25mm to 19mm irrigation reducer do?
It joins compatible 25mm and 19mm irrigation pipe, allowing the pipe diameter to change within the same irrigation run.
Which end connects to 25mm irrigation pipe?
The larger barbed end is the 25mm connection, while the smaller barbed end is designed for compatible 19mm irrigation pipe.
Can I use this fitting to reduce a 25mm irrigation line to 19mm?
Yes. This is the primary purpose of the fitting, providing a direct transition from compatible 25mm pipework to 19mm pipework.
Is this a straight or angled reducer?
It is a straight inline reducer, so the pipework continues in the same direction while changing from one diameter to the other.
Are both ends of the reducer barbed?
Yes. It uses different-sized barbed connections at either end for compatible 25mm and 19mm irrigation pipe.
Can this reducer be used in hydroponic irrigation systems?
Yes. It is suitable for compatible hydroponic and horticultural irrigation layouts using 25mm and 19mm pipework.
What is the difference between a reducer and a reducing tee?
This reducer joins 25mm and 19mm pipe in one continuous straight run. A reducing tee creates an additional branch, allowing another section of pipework to leave the main irrigation line.
Can the reducer be installed in either direction?
The fitting simply connects compatible 25mm pipework to 19mm pipework, so it can be used wherever those two pipe sizes need to meet within the irrigation layout.

£1.25
Unit price per£1.25
Unit price per8 way plastic airline manifold for splitting one air supply into eight separate 4mm airline feeds.
This 8 Way Plastic Airline Manifold provides a simple way to distribute air from a single larger air pump or compressor to multiple air stones, air curtains or aeration points.
The manifold features one larger 8mm inlet and eight smaller 4mm outlets, allowing a single incoming air supply to be divided across several individual airline runs.
It is particularly useful in hydroponic systems, nutrient reservoirs and other growing setups where several pots, tanks or air stones need to be supplied from the same air pump.
Why use an 8 Way Airline Manifold?
What is an 8 way airline manifold used for?
An airline manifold takes the output from one air pump or compressor and divides it into several smaller airline feeds. This allows multiple air stones, air curtains or aeration points to operate from the same main air supply.
The eight 4mm outlets make it particularly useful for larger hydroponic or irrigation setups where several reservoirs, tanks or growing positions require aeration at the same time.
How to use the 8 Way Plastic Airline Manifold
Connect the 8mm inlet to a suitable airline running from your air pump or compressor. Attach individual 4mm airline lengths to the eight outlet connections, then route each line to the required air stone, air curtain or aeration point.
Position the manifold where the airline runs can be kept tidy and as direct as possible. Keeping individual outlet lines reasonably similar in length can also help create a more balanced aeration layout.
The amount of air reaching each outlet will depend on the performance of the air pump, the number of outlets being used, airline length and the resistance created by the connected air stones or diffusers.
Product details
| Product type | Airline distribution manifold |
|---|---|
| Number of outlets | 8 |
| Inlet size | 8mm |
| Outlet size | 4mm |
| Configuration | 1 inlet to 8 outlets |
| Construction | Plastic |
| Typical applications | Air pumps, air stones, air curtains, reservoirs & hydroponic aeration systems |
8 Way Plastic Airline Manifold FAQs
What does an 8 way airline manifold do?
It divides one larger air supply into eight smaller airline feeds, allowing several air stones, air curtains or other aeration points to run from the same air pump.
What size airline fits the manifold?
The manifold has an 8mm inlet for the main air supply and eight 4mm outlets for individual airline runs.
Can I use this manifold with air stones?
Yes. The 4mm outlets are suitable for running standard airline to compatible air stones and other aeration accessories.
Can I use this manifold in a hydroponic system?
Yes. It is well suited to hydroponic systems where one air pump needs to supply several reservoirs, pots or air stones.
How many air stones can one manifold run?
The manifold provides eight separate outlets, so it can supply up to eight individual airline runs. The number of air stones that can be operated effectively will depend on the output of the connected air pump and the resistance within the system.
Do I need a powerful air pump for an 8 way manifold?
The air pump needs to provide enough output for the number and type of aeration devices connected. Larger air stones, longer airline runs and multiple outlets will all increase the demand on the pump.
Can I use fewer than eight outlets?
Yes. You can run fewer than eight airline feeds if required. Any unused connections should be managed so that air is not unnecessarily lost from the system.
What can the 4mm outlets be connected to?
The 4mm outlets can be used with compatible airline feeding air stones, air curtains and other aeration accessories commonly used in hydroponic growing systems.
£1.10
Unit price per£1.10
Unit price per6 way plastic airline manifold for splitting one 8mm air supply into six separate 4mm airline feeds.
This 6 Way Plastic Airline Manifold provides a simple way to distribute air from one larger air pump or compressor across multiple air stones, diffusers or aeration points.
A single 8mm inlet feeds six 4mm outlets, allowing you to run several standard airline connections from one central point. It is a straightforward way to create a cleaner, more organised aeration setup without needing a separate pump outlet for every air stone.
Ideal for hydroponic reservoirs, DWC systems and other growing setups where several aeration points need to operate from the same air supply.
Why use a 6 Way Airline Manifold?
What is a 6 way airline manifold used for?
An airline manifold divides the output from one larger air supply into several smaller feeds. With six 4mm outlets available, this manifold makes it possible to supply multiple air stones or other aeration devices from one suitable air pump or compressor.
It is particularly useful when aerating larger nutrient reservoirs or when one air pump needs to serve several pots, tanks or growing positions.
How to use the 6 Way Plastic Airline Manifold
Connect the 8mm inlet to the main airline from a suitable air pump or compressor. Attach individual 4mm airline runs to the six smaller outlets, then route each line to the required air stone, diffuser or aeration point.
Keep the airline runs tidy and avoid unnecessary bends or restrictions. The amount of air delivered through each outlet will depend on the output of the connected pump, the number of outlets in use, airline length and the resistance created by the connected air stones or diffusers.
This type of manifold can also be used for distributing nutrient solution in suitable NFT installations where its connection sizes and flow characteristics are appropriate for the system.
Product details
| Product type | Air / nutrient distribution manifold |
|---|---|
| Number of outlets | 6 |
| Inlet size | 8mm |
| Outlet size | 4mm |
| Configuration | 1 inlet to 6 outlets |
| Construction | Plastic |
| Primary application | Splitting airline from an air pump or compressor |
| Typical uses | Air stones, aeration systems, hydroponic reservoirs & suitable NFT systems |
6 Way Plastic Airline Manifold FAQs
What does a 6 way airline manifold do?
It takes one larger air supply and divides it between six smaller airline connections, making it possible to operate multiple aeration points from one suitable air pump or compressor.
What size connections does the manifold have?
The manifold has one 8mm inlet and six 4mm outlets.
How many air stones can I connect?
There are six individual outlets, allowing up to six separate airline runs to be connected. How many air stones can be operated effectively will depend on the output and pressure of the air pump being used.
Can I use this manifold with a hydroponic air pump?
Yes. It is designed for splitting airline from a suitable larger air pump or compressor and is well suited to hydroponic aeration systems.
What size airline connects to the outlets?
The six outlets are 4mm, making them suitable for compatible 4mm airline used with hydroponic air stones and aeration accessories.
Can the manifold be used in a DWC system?
Yes. It can be used to distribute air to multiple air stones in DWC and other hydroponic systems where additional nutrient solution aeration is required.
Can this manifold distribute nutrient solution as well as air?
Yes. Although commonly used as an airline splitter, this manifold can also be used to distribute nutrient solution in suitable NFT systems.
Does the manifold control the airflow to each outlet?
No. This plastic manifold acts as a simple distributor and does not have individual airflow control valves on each outlet.
20 way plastic airline manifold for distributing one larger air supply across multiple air stones, air curtains and aeration points.
This 20 Way Plastic Airline Manifold provides a straightforward way to divide the output from a larger air pump or compressor across multiple airline runs. With 20 separate outlets available, it is particularly useful for larger hydroponic systems where numerous reservoirs, pots or air stones require aeration.
Bringing multiple airline feeds together at one central manifold helps keep larger aeration systems organised and avoids the need for a separate pump outlet for every air stone.
The manifold can be used with compatible 4mm airline to supply air stones and air curtains throughout a growing system. It can also be used to distribute nutrient solution in suitable NFT installations.
Why use a 20 Way Airline Manifold?
What is a 20 way airline manifold used for?
A 20 way manifold is designed for larger systems where a single high-output air pump or compressor needs to supply numerous aeration points. The incoming supply enters the manifold and is divided between 20 individual outlets.
Individual airline runs can then be routed to air stones, air curtains or other compatible aeration equipment positioned throughout the growing system.
This makes the manifold particularly useful for multi-pot hydroponic installations, larger nutrient reservoirs and systems containing several separate tanks or growing modules.
How to use the 20 Way Plastic Airline Manifold
Connect the manifold inlet to a suitable main supply from your air pump or compressor. Attach compatible 4mm airline to the required outlets and route each line to its air stone, air curtain or other aeration device.
When running a large number of outlets, the connected air pump needs sufficient output to supply the complete system. Air delivery at each point will depend on pump performance, the number of outlets being used, airline length and the resistance created by the connected air stones or diffusers.
Keep airline routes as tidy and direct as practical, avoiding unnecessary kinks or restrictions that could reduce airflow.
Product details
| Product type | Air / nutrient distribution manifold |
|---|---|
| Number of outlets | 20 |
| Outlet size | 4mm |
| Configuration | 20 way distribution manifold |
| Construction | Plastic |
| Primary application | Splitting airline from a larger air pump or compressor |
| Suitable accessories | Compatible airline, air stones & air curtains |
| Typical uses | Hydroponic aeration, reservoirs, multi-pot systems, DWC & suitable NFT systems |
20 Way Plastic Airline Manifold FAQs
What does a 20 way airline manifold do?
It divides one larger air supply between up to 20 individual airline runs, allowing multiple air stones or other aeration devices to operate from a suitable air pump or compressor.
How many air stones can I connect to the manifold?
The manifold provides 20 outlets, allowing up to 20 individual airline runs. The number of air stones that can operate effectively will depend on the output of the connected air pump and the requirements of the aeration equipment.
What size airline fits the outlets?
The manifold uses 4mm outlets for connecting compatible airline to air stones, air curtains and other aeration accessories.
Can I use this manifold with a hydroponic air pump?
Yes. It is designed to split the supply from a suitable larger air pump or compressor across multiple airline feeds.
Can the manifold be used with air stones and air curtains?
Yes. It can distribute air through individual airline runs to compatible air stones, air curtains and similar aeration equipment.
Is a 20 way manifold suitable for DWC?
Yes. It is particularly useful for larger DWC installations where one suitably sized air pump needs to supply multiple buckets, reservoirs or air stones.
Can this manifold distribute nutrient solution?
Yes. This style of plastic manifold can also be used to distribute nutrient solution in suitable NFT systems.
Does the manifold have individual airflow controls?
No. This is a simple plastic distribution manifold rather than a valved manifold, so the individual outlets do not have built-in airflow adjustment controls.
Do I need a larger air pump for a 20 way manifold?
A pump needs sufficient output for the number of outlets and aeration devices being operated. Running 20 air stones will require considerably more air than using only a few outlets, so the pump should be sized for the complete installation.
£1.45
Unit price per£1.45
Unit price per10 way plastic airline manifold for splitting one 8mm air supply into ten separate 4mm airline feeds.
This 10 Way Plastic Airline Manifold makes it easy to distribute air from a single larger air pump or compressor across multiple air stones, air curtains or other aeration points.
The manifold has one 8mm inlet and ten 4mm outlets, allowing a larger incoming airline to be divided into ten individual feeds. It is a simple way to build an organised multi-point aeration system without requiring a separate pump outlet for every air stone.
Particularly useful for hydroponic reservoirs and multi-pot systems, the manifold can also be used to distribute nutrient solution in suitable NFT installations.
Why use a 10 Way Airline Manifold?
What is a 10 way airline manifold used for?
An airline manifold divides the output from one larger air pump or compressor into several smaller feeds. This 10 way version provides ten 4mm outlets, making it particularly useful where several air stones or aeration devices need to operate from the same main air supply.
It can be used to aerate nutrient reservoirs, DWC systems and other hydroponic setups where oxygenation is required at multiple points.
The manifold can also be incorporated into suitable NFT systems to divide nutrient solution between multiple feeds.
How to use the 10 Way Plastic Airline Manifold
Connect the 8mm inlet to the main airline from a suitably sized air pump or compressor. Attach 4mm airline to the required outlets, then route each individual line to its air stone, air curtain or other compatible aeration device.
Keep airline runs tidy and avoid unnecessary kinks or restrictions. The airflow available at each outlet will depend on the total output of the air pump, the number of outlets being used, airline length and the resistance created by the connected air stones or diffusers.
For a larger multi-point setup, choosing an air pump with sufficient capacity is important because the pump's total air output is shared across the connected outlets.
Product details
| Product type | Air / nutrient distribution manifold |
|---|---|
| Number of outlets | 10 |
| Inlet size | 8mm |
| Outlet size | 4mm |
| Configuration | 1 inlet to 10 outlets |
| Construction | Plastic |
| Primary application | Splitting airline from an air pump or compressor |
| Typical applications | Air stones, hydroponic aeration, nutrient reservoirs, DWC & suitable NFT systems |
10 Way Plastic Airline Manifold FAQs
What does a 10 way airline manifold do?
It divides one larger air supply into ten smaller feeds, allowing multiple air stones or other aeration devices to operate from a suitable air pump or compressor.
What size connections does the 10 way manifold have?
It has one 8mm inlet and ten 4mm outlets.
What size airline fits the outlets?
The ten outlets are designed for compatible 4mm airline commonly used with hydroponic air stones and aeration equipment.
How many air stones can I connect?
The manifold provides ten individual outlets, so it can supply up to ten separate airline runs. Effective performance will depend on the output of the air pump and the resistance created by the connected equipment.
Can I use this manifold with a hydroponic air pump?
Yes. Its primary purpose is to divide the output from a suitable larger air pump or compressor between multiple airline feeds.
Is the 10 way manifold suitable for DWC?
Yes. It is useful for DWC and other hydroponic systems where a suitably sized air pump needs to supply air to several buckets, reservoirs or air stones.
Can this manifold distribute nutrient solution?
Yes. As well as dividing airline, this style of manifold can be used to distribute nutrient solution in suitable NFT systems.
Does the manifold control the airflow to each outlet?
No. This is a simple distribution manifold without individual airflow control valves.
Do I need to use all ten outlets?
No. The number of outlets used can be matched to the system, but unused outlets need to be closed off appropriately to prevent unnecessary loss of air.

Compact 50mm golf ball air stone for adding a steady stream of bubbles and extra aeration to hydroponic nutrient solutions.
The 50mm Golf Ball Air Stone is a simple and effective way to aerate nutrient solutions and water reservoirs. Connect it to a suitable air pump using 4mm airline and the porous stone disperses the incoming air as bubbles throughout the solution.
Increasing aeration helps keep nutrient solution moving and supplies additional oxygen to the water around the root zone. Its compact golf ball shape makes this a useful choice for individual reservoirs, DWC buckets, bubbler systems and other hydroponic setups where space is limited.
For larger growing systems, several air stones can be operated from a suitably sized air pump using an airline manifold, allowing aeration to be distributed across multiple pots or reservoirs.
Why use a 50mm Golf Ball Air Stone?
What is a golf ball air stone used for?
A golf ball air stone is submerged in water or nutrient solution and connected to an external air pump. Air passes through the porous body of the stone and is dispersed into the surrounding solution as bubbles.
In hydroponic growing systems, air stones are commonly used in nutrient reservoirs and DWC systems to increase aeration around the root zone. They can also help keep the solution moving rather than allowing it to remain completely still.
How to use the 50mm Golf Ball Air Stone
Connect a length of compatible 4mm airline to the air stone inlet, then connect the other end to a suitable air pump or air manifold. Place the air stone below the surface of the water or nutrient solution and switch on the air pump.
Positioning the air stone towards the bottom of the reservoir allows the bubbles to travel through more of the solution before reaching the surface, helping circulate and aerate the surrounding water.
When running several air stones from one pump, make sure the pump provides sufficient airflow for the complete setup. A manifold can be used to divide the main air supply between individual 4mm airline runs.
Product details
| Product type | Air stone / air diffuser |
|---|---|
| Style | Golf ball |
| Diameter | 50mm |
| Airline connection | 4mm |
| Operation | Connects to a suitable external air pump |
| Typical applications | Hydroponic reservoirs, nutrient tanks, DWC & bubbler systems |
| Air pump included | No |
| Airline included | No |
50mm Golf Ball Air Stone FAQs
What does a golf ball air stone do?
An air stone takes air supplied by an external pump and disperses it as bubbles through water or nutrient solution, helping increase aeration and circulation.
What size is this air stone?
The golf ball air stone measures 50mm in diameter.
What size airline does the 50mm air stone use?
It has a 4mm connection for compatible airline.
Do I need an air pump to use this air stone?
Yes. The air stone needs to be connected by airline to a suitable external air pump or compressor to produce bubbles.
Can I use this air stone in a hydroponic nutrient reservoir?
Yes. The 50mm golf ball air stone is well suited to aerating nutrient solution in hydroponic reservoirs and tanks.
Is a 50mm golf ball air stone suitable for DWC?
Yes. Golf ball air stones are commonly used in deep water culture and bubbler systems to provide continuous aeration within the nutrient solution.
Where should I position the air stone?
Place the air stone below the surface of the solution, preferably towards the bottom of the reservoir or bucket so the bubbles can rise through the water.
Can I run several air stones from one air pump?
Yes. A suitably sized air pump can supply multiple air stones. An airline manifold can be used to split the main air supply into several individual airline feeds.
Does the air stone come with airline?
No. The air stone is supplied separately, so compatible 4mm airline and a suitable air pump are required to create a working aeration setup.

£0.50
Unit price per£0.50
Unit price perHigh-output 70mm cylindrical air stone for increasing aeration and circulation in hydroponic nutrient reservoirs and DWC systems.
The 70mm Coke Can Air Stone is designed to disperse air throughout water or nutrient solution, helping growers maintain a well-aerated root environment. Its cylindrical shape provides a larger diffusing surface than smaller ball-style air stones, making it a useful choice for hydroponic reservoirs and systems requiring a stronger level of aeration.
Connect the air stone to a suitably powerful external air pump and submerge it in the reservoir. Air is forced through the porous body, creating a continuous spread of bubbles that helps increase dissolved oxygen and keeps the surrounding nutrient solution moving.
Coke can air stones are particularly well suited to DWC, bubbler systems and nutrient reservoirs. Several can also be run from a larger air pump using a suitable airline manifold for multi-pot or multi-reservoir installations.
Why choose a 70mm Coke Can Air Stone?
What is a Coke Can Air Stone used for?
A Coke Can Air Stone is a porous diffuser used to introduce air into water or hydroponic nutrient solution. Unlike an open airline that releases air from a single point, the porous surface breaks the incoming airflow into a continuous spread of bubbles.
In hydroponics, this makes it particularly useful for aerating nutrient reservoirs and systems where plant roots remain in or have regular contact with nutrient solution. The moving bubbles increase gas exchange and help prevent the water immediately around the diffuser from remaining stagnant.
Ideal for DWC and hydroponic reservoirs
The larger cylindrical design makes this air stone particularly useful in deep water culture systems and nutrient tanks where stronger aeration is required. It can be positioned towards the bottom of the reservoir so bubbles rise through the nutrient solution before reaching the surface.
For multi-pot systems, several air stones can be connected to a suitably sized air pump. An airline manifold can divide the main air supply into individual feeds for each reservoir or growing position.
How to use the 70mm Coke Can Air Stone
Connect the air stone to compatible airline running from a suitable external air pump or compressor. Submerge the complete porous section of the air stone in the water or nutrient solution, ideally positioning it towards the bottom of the reservoir.
Switch on the air pump and check that bubbles are being produced across the diffuser. This 70mm Coke Can Air Stone is designed for relatively high airflow and is listed for approximately 5 – 10 litres of air per minute, so the connected pump should be appropriately sized.
If bubble production reduces over time, inspect the airline and air stone for restrictions or mineral deposits. Keeping the diffuser clean helps maintain consistent airflow through its porous surface.
Product details
| Product type | Air stone / air diffuser |
|---|---|
| Style | Coke can / cylindrical |
| Height | 70mm |
| Diameter | 30mm |
| Recommended airflow | 5 – 10 litres per minute |
| Operation | Connects to a suitable external air pump or compressor |
| Typical applications | Hydroponic reservoirs, nutrient tanks, DWC & bubbler systems |
| Air pump included | No |
| Airline included | No |
70mm Coke Can Air Stone FAQs
What does a Coke Can Air Stone do?
It takes air supplied by an external air pump and disperses it as bubbles through water or nutrient solution. This increases aeration and encourages movement within the reservoir.
What size is the 70mm Coke Can Air Stone?
This version measures approximately 70mm high and 30mm in diameter.
How much airflow does the 70mm Coke Can Air Stone need?
This Coke Can Air Stone is designed for approximately 5 – 10 litres of airflow per minute, so it should be paired with a suitably sized air pump.
Is a Coke Can Air Stone suitable for DWC?
Yes. Its cylindrical diffusing surface makes it particularly useful for aerating nutrient solution in DWC buckets and other deep water culture systems.
Can I use this air stone in a nutrient reservoir?
Yes. It can be submerged in a hydroponic nutrient reservoir to provide continuous aeration and help keep the solution moving.
Where should I position a Coke Can Air Stone?
Position it below the surface of the solution, preferably towards the bottom of the reservoir. This gives the bubbles more opportunity to travel through the water before reaching the surface.
Can I run several Coke Can Air Stones from one pump?
Yes, provided the air pump has sufficient output. A suitable manifold can be used to divide the main air supply between several individual air stones.
Why has my air stone started producing fewer bubbles?
Reduced bubbling can be caused by restricted airline, insufficient pump output or deposits building up within the porous diffuser. Inspecting the airline and cleaning the air stone can help restore airflow.
Does the Coke Can Air Stone include an air pump?
No. The air stone is supplied separately and requires a compatible airline and suitably sized external air pump or compressor.
£0.50
Unit price per£0.50
Unit price perLarge 100mm cylindrical air stone for powerful aeration and circulation in hydroponic nutrient reservoirs and DWC systems.
The 100mm Coke Can Air Stone is a large porous air diffuser designed to introduce a continuous supply of bubbles into water or hydroponic nutrient solution. Its substantial cylindrical surface provides plenty of area for dispersing air, making it particularly useful in larger reservoirs and systems that need vigorous aeration.
Connect the air stone to a suitably powerful external air pump and position it below the surface of the nutrient solution. Air passes through the porous diffuser and emerges as bubbles, increasing aeration while helping to keep the surrounding solution moving.
The 100mm version measures approximately 100mm high by 50mm in diameter, giving it a larger diffusing body than the 70mm Coke Can Air Stone. It is a useful choice for DWC systems, bubbler systems and larger hydroponic nutrient reservoirs.
Why choose a 100mm Coke Can Air Stone?
What is a 100mm Coke Can Air Stone used for?
A Coke Can Air Stone is submerged in water or nutrient solution and supplied with air from an external pump. The porous body breaks the incoming airflow into bubbles rather than releasing air from a single open airline.
This makes the 100mm version particularly useful for hydroponic nutrient tanks and DWC systems where continuous aeration is needed around submerged roots. Its larger cylindrical body also makes it a practical option for bigger reservoirs where a small air stone may not provide the desired spread of bubbles.
Ideal for larger hydroponic reservoirs
At approximately 100mm high and 50mm in diameter, this is a sizeable air diffuser designed for use with a suitable high-output air pump. Positioning the air stone towards the bottom of a reservoir allows bubbles to rise through more of the nutrient solution before reaching the surface.
Several Coke Can Air Stones can also be incorporated into a larger aeration system. A suitable airline manifold allows one sufficiently powerful air pump or compressor to supply individual air stones across several reservoirs or growing positions.
How to use the 100mm Coke Can Air Stone
Connect the air stone to compatible airline running from a suitable external air pump or compressor. Place the air stone in the nutrient tank or reservoir, keeping the porous diffuser submerged and preferably positioned towards the bottom.
Switch on the air pump and check that bubbles are being produced through the diffuser. Coke Can Air Stones require a substantial air supply, with current UK hydroponic listings specifying approximately 5 – 10 litres of air per minute, so use a pump capable of providing the required airflow.
If the air stone is being used as part of a multi-outlet system, remember that the pump's total output is shared between all connected diffusers. The air pump therefore needs to be sized for the complete aeration setup rather than for a single air stone.
Over time, deposits can restrict the porous surface and reduce bubble production. Keeping the diffuser clean and checking the airline for kinks or blockages will help maintain consistent performance.
Product details
| Product type | Air stone / air diffuser |
|---|---|
| Style | Coke can / cylindrical |
| Height | 100mm |
| Diameter | 50mm |
| Recommended airflow | Approximately 5 – 10 litres per minute |
| Operation | Connects to a suitable external air pump or compressor |
| Typical applications | Hydroponic reservoirs, nutrient tanks, DWC & bubbler systems |
| Air pump included | No |
| Airline included | No |
100mm Coke Can Air Stone FAQs
What size is the 100mm Coke Can Air Stone?
This larger Coke Can Air Stone measures approximately 100mm high and 50mm in diameter.
What does a Coke Can Air Stone do?
It takes air supplied by an external pump and disperses it through its porous surface as bubbles, helping to aerate and circulate water or hydroponic nutrient solution.
How much airflow does a Coke Can Air Stone need?
Current UK hydroponic listings specify approximately 5 – 10 litres of air per minute for Coke Can Air Stones. A suitably sized air pump should therefore be used to achieve effective aeration.
Is the 100mm Coke Can Air Stone suitable for DWC?
Yes. Its large cylindrical diffusing surface makes it particularly useful for aerating nutrient solution in deep water culture systems.
Can I use this air stone in a large nutrient reservoir?
Yes. The 100mm Coke Can Air Stone is well suited to larger hydroponic nutrient tanks and reservoirs where a substantial diffusing surface is useful.
Where should I position the air stone?
Position the air stone below the surface of the nutrient solution, preferably towards the bottom of the reservoir. This allows the bubbles to rise through more of the solution before reaching the surface.
Can I run several 100mm Coke Can Air Stones from one pump?
Yes, provided the air pump has enough total output for all of the connected air stones. A suitable airline manifold can be used to divide the main air supply between several diffusers.
Why is my air stone producing fewer bubbles?
Reduced bubble production can be caused by insufficient pump output, restricted airline or deposits building up within the porous diffuser. Check the airline and pump first, then clean the air stone if its surface has become restricted.
Does the 100mm Coke Can Air Stone include a pump or airline?
No. The air stone is supplied separately and requires compatible airline and a suitably sized external air pump or compressor.

£50.00
Unit price per£50.00
Unit price per50m roll of porous 4mm bubbler tubing for creating custom-length air diffusers and an even wall of bubbles in hydroponic reservoirs.
This 4mm Bubbler Tubing gives growers a flexible alternative to conventional air stones. Instead of carrying air to a separate diffuser, the porous tubing releases air through its surface, producing bubbles along the length of the tube.
Supplied as a 50m roll, it can be cut and arranged to suit different reservoir shapes and aeration layouts. This makes it particularly useful for custom hydroponic systems, larger nutrient tanks and applications where you want to spread aeration across a wider area rather than concentrate it around a single air stone.
The tubing has a 4mm internal diameter and approximately 9mm external diameter. Connect it to a suitable air supply, close the far end and position the porous section within the reservoir to create your own air diffuser.
Why choose 4mm Bubbler Tubing?
What is bubbler tubing used for?
Bubbler tubing is a porous air diffuser supplied in flexible tube form. When connected to an air pump, air passes through the walls of the submerged tubing and creates a fine, even spread of bubbles.
Because the tubing itself acts as the diffuser, growers can create aeration layouts that follow the shape of a reservoir or cover a wider area than a small individual air stone. It is particularly useful for DIY hydroponic systems and custom reservoir setups.
Bubbler tubing or an air stone?
A conventional air stone concentrates aeration around a fixed diffuser. Bubbler tubing allows the diffusing area to be extended along a chosen length, giving you more freedom over where bubbles are produced within the reservoir.
This makes bubbler tubing a useful option for long tanks, larger reservoirs and unusual layouts where several fixed air stones would otherwise be needed to spread aeration across the available space.
How to use 4mm Bubbler Tubing
Cut the bubbler tubing to the required length for your reservoir or aeration layout. Connect one end to a compatible airline supply from a suitably sized air pump, using the appropriate connector where required.
Seal the opposite end with a compatible stop end so that the incoming air is forced through the porous wall of the tubing. Position the bubbler tubing below the surface of the water or nutrient solution, then switch on the air pump and check that bubbles are being produced along the required section.
Longer lengths of bubbler tubing place greater demand on the air supply, so the connected pump should be sized for the amount of tubing being operated and the level of aeration required.
Product details
| Product type | Porous bubbler tubing / flexible air diffuser |
|---|---|
| Roll length | 50m |
| Internal diameter | 4mm |
| External diameter | Approximately 9mm |
| Diffuser type | Porous tubing |
| Operation | Air is dispersed through the porous wall of the tubing |
| Typical applications | Hydroponic reservoirs, nutrient tanks, DWC & custom aeration systems |
| Air pump included | No |
4mm Bubbler Tubing FAQs
What is bubbler tubing?
Bubbler tubing is porous tubing designed to act as an air diffuser. When connected to an air pump and submerged, air escapes through the tubing wall to create bubbles along its length.
Does bubbler tubing replace an air stone?
Yes, it can. The porous tubing itself acts as the diffuser, so a separate air stone is not required at the end of the bubbler section.
What size is this bubbler tubing?
The tubing has a 4mm internal diameter and approximately 9mm external diameter. This product is supplied as a 50m roll.
Can I cut bubbler tubing to length?
Yes. One of the main advantages of bubbler tubing is that it can be cut to create an aeration section suited to the reservoir or hydroponic system being built.
Do I need to seal the end of bubbler tubing?
Yes. The far end should be closed with a compatible stop end so that the supplied air is forced through the porous tubing rather than escaping freely from the open end.
Can I use bubbler tubing in a hydroponic reservoir?
Yes. It is particularly useful for hydroponic reservoirs because the tubing can be positioned to distribute bubbles across a wider area of nutrient solution.
Is bubbler tubing suitable for DWC?
Yes. Bubbler tubing can be used as a diffuser in DWC systems where continuous nutrient solution aeration is required.
What air pump do I need for bubbler tubing?
The required pump capacity depends on the length of bubbler tubing being operated and the aeration required. Longer diffuser runs need a greater air supply than short sections, so the pump should be sized for the complete setup.
Can I make a custom-shaped air diffuser with bubbler tubing?
Yes. Its flexible format makes bubbler tubing useful for creating custom aeration layouts within reservoirs where a conventional fixed air stone may not provide the desired coverage.

200m roll of clear 4mm airline tubing for connecting air pumps and manifolds to air stones, diffusers and hydroponic aeration equipment.
This 4mm Clear Airline Tubing provides the link between your air pump and the equipment doing the aerating. Supplied on a generous 200m roll, it is ideal for building larger hydroponic aeration systems, replacing old airline or cutting multiple individual runs for pots and reservoirs.
Use it to carry air from a compatible air pump directly to an air stone, or connect it to the outlets of an airline manifold when one larger pump is supplying several aeration points.
The long 200m roll is particularly useful for commercial grow rooms, propagation areas and multi-pot hydroponic installations where numerous lengths of airline are needed from one central supply.
Why choose 4mm Clear Airline Tubing?
What is 4mm airline tubing used for?
Airline tubing carries air from an external air pump to an air stone, diffuser or other aeration accessory. In hydroponic systems, this allows growers to position the pump away from the reservoir while delivering air directly to the submerged diffuser.
It can also be used with compatible airline manifolds. A larger incoming air supply is divided at the manifold, with individual lengths of 4mm airline then running to separate air stones or aeration points.
This makes a 200m roll particularly practical for DWC systems, nutrient reservoirs, propagation setups and larger multi-pot installations where many separate airline runs are required.
How to use 4mm Airline Tubing
Cut the airline to the length required for your installation. Push one end securely onto the compatible outlet of your air pump or manifold and connect the other end to an air stone, diffuser or other suitable aeration accessory.
Route the tubing neatly between the air supply and reservoir, avoiding sharp bends, crushing or kinks that could restrict airflow. For multi-pot installations, cut individual runs from the roll and connect them to the corresponding outlets on the manifold.
When planning a larger system, remember that longer airline runs and multiple air stones increase the demand placed on the pump. The air pump should therefore provide enough total airflow for the complete installation.
Product details
| Product type | Airline tubing |
|---|---|
| Airline size | 4mm |
| Roll length | 200m |
| Colour | Clear |
| Primary use | Carrying air between compatible air pumps, manifolds, air stones & diffusers |
| Typical applications | Hydroponic aeration, DWC, nutrient reservoirs, propagation systems & multi-pot installations |
| Supplied as | 200m roll |
4mm Clear Airline Tubing FAQs
What is 4mm airline tubing used for?
It is used to carry air from a compatible air pump or manifold to air stones, diffusers and other aeration equipment.
How much airline is supplied?
This product is supplied as a 200m roll, making it particularly useful for larger systems and installations requiring numerous separate airline runs.
Can I cut the airline tubing to length?
Yes. The 200m roll can be cut into individual lengths to suit the layout of your aeration system.
Can I use this airline with air stones?
Yes. The tubing is designed for carrying air from a compatible pump or manifold to air stones and other suitable aeration diffusers.
Can I use 4mm airline with a manifold?
Yes. It can be connected to compatible 4mm manifold outlets to create individual air feeds for several air stones or reservoirs.
Is this airline suitable for hydroponics?
Yes. It is well suited to hydroponic aeration systems, including DWC setups, nutrient reservoirs and multi-pot installations.
Is this the same as porous bubbler tubing?
No. Standard airline carries air to a separate air stone or diffuser. Porous bubbler tubing acts as the diffuser itself and releases bubbles through the wall of the tubing.
Can one air pump supply several lengths of airline?
Yes. A suitable manifold can divide the output from a sufficiently powerful air pump between several individual 4mm airline runs.
How should I route airline tubing?
Keep runs as direct and tidy as practical and avoid sharp bends, crushing or kinks that could restrict the flow of air to the connected diffuser.

£3.49
Unit price per£3.49
Unit price per150mm flat ceramic air stone for producing a wide spread of fine bubbles across hydroponic nutrient reservoirs and DWC systems.
The 150mm Round Flat Ceramic Air Stone provides a simple way to increase aeration and movement throughout a hydroponic nutrient solution. Its broad, porous ceramic surface releases air as many small bubbles, spreading aeration over a much wider area than a compact ball-style air stone.
At 150mm or 6 inches in diameter, the disc sits flat at the bottom of a reservoir or tank. Connect the 4mm inlet to a suitable air pump using compatible airline and the incoming air is distributed through the porous ceramic body.
It is particularly useful for DWC systems, hydroponic nutrient reservoirs and other growing systems where continuous aeration helps keep the solution moving around the root zone.
Why choose a 150mm Flat Ceramic Air Stone?
What is a flat ceramic air stone used for?
A flat ceramic air stone is a submerged diffuser that takes air from an external pump and distributes it through thousands of small pores. Instead of releasing air from a single open airline, the ceramic surface produces a broad spread of bubbles across the reservoir.
The 150mm disc format is particularly useful where you want aeration distributed across a wider area. Its low, flat shape allows the air stone to sit at the bottom of the tank while bubbles rise through the nutrient solution above it.
Ideal for DWC and nutrient reservoirs
In deep water culture systems, roots spend extended periods in nutrient solution, making active aeration an important part of the setup. A flat air stone positioned beneath the root zone creates a continuous stream of bubbles while helping keep the nutrient solution moving.
The 150mm size is also well suited to standalone nutrient reservoirs and other hydroponic tanks where a broader diffusing surface is preferred to a small individual air stone.
How to use the 150mm Ceramic Air Stone
Connect compatible 4mm airline to the inlet on the side of the air stone, then connect the other end to a suitably sized external air pump. Place the ceramic disc flat at the bottom of the reservoir and keep the porous section submerged.
Once the pump is switched on, air passes through the ceramic body and bubbles rise through the surrounding water or nutrient solution.
Keep the airline free from kinks and restrictions. For added protection against water travelling back towards the pump when it is switched off, the air pump can be positioned above the water level or a suitable non-return valve can be incorporated into the airline.
Product details
| Product type | Ceramic air stone / air diffuser |
|---|---|
| Shape | Round flat disc |
| Diameter | 150mm / 6" |
| Airline inlet | 4mm |
| Diffuser material | Porous ceramic |
| Position | Sits flat in the bottom of a reservoir or tank |
| Typical applications | Hydroponic nutrient reservoirs, DWC systems & aerated water tanks |
| Outer case quantity | 30 |
| Air pump included | No |
| Airline included | No |
150mm Ceramic Air Stone FAQs
What size is this ceramic air stone?
The air stone is 150mm, or approximately 6 inches, in diameter and has a flat circular design.
What size airline does the 150mm air stone use?
This 150mm version has a 4mm inlet for connecting compatible airline to a suitable air pump.
What does a ceramic air stone do?
Air supplied by an external pump passes through the porous ceramic body and is released as many small bubbles, helping aerate and circulate the surrounding water or nutrient solution.
Is the 150mm air stone suitable for DWC?
Yes. Its broad diffusing surface makes it particularly useful for aerating nutrient solution in deep water culture systems.
Where should I position a flat air stone?
Place it flat towards the bottom of the reservoir or tank. This allows bubbles to rise through the nutrient solution from a low position in the system.
Does this air stone need an air pump?
Yes. The ceramic air stone is a diffuser and requires a suitable external air pump to supply the airflow.
Is an air pump or airline included?
No. The air stone is supplied separately, so a suitable air pump and compatible 4mm airline are required to create a complete aeration setup.
Can I use more than one 150mm air stone?
Yes. Multiple air stones can be incorporated into a larger aeration system provided the connected air pump has sufficient output. A suitable manifold can be used to divide the air supply between separate airline runs.
Why use a flat air stone instead of a small ball air stone?
The larger flat ceramic surface spreads bubbles across a wider area, making it useful when you want broader aeration across the bottom of a nutrient reservoir rather than a concentrated stream from a smaller diffuser.
100mm flat ceramic air stone for creating a wide spread of fine bubbles in hydroponic nutrient reservoirs and DWC systems.
The 100mm Round Flat Ceramic Air Stone provides effective aeration without taking up unnecessary space in the bottom of a reservoir. Its broad porous surface disperses air as many small bubbles, helping oxygenate the nutrient solution while creating useful movement within the tank.
Measuring 100mm, or approximately 4 inches, across, this compact ceramic disc sits flat on the bottom of a reservoir. Connect it to a suitable external air pump using compatible airline and air is forced through the porous stone before bubbling through the surrounding solution.
It is a practical choice for DWC buckets, hydroponic nutrient reservoirs and other systems where continuous aeration is required around the root zone.
Why choose a 100mm Flat Ceramic Air Stone?
What is a flat ceramic air stone used for?
A flat ceramic air stone acts as a submerged diffuser. Air supplied by an external pump is forced through the many pores in the ceramic body, creating a spread of small bubbles rather than releasing the air from one open airline.
As those bubbles rise through the reservoir they create movement in the nutrient solution and increase aeration. The flat disc design also keeps the diffuser low in the tank, allowing bubbles to rise through the water from near the bottom of the reservoir.
Ideal for DWC and hydroponic reservoirs
The 100mm size is particularly useful for DWC buckets and individual nutrient reservoirs where a compact diffuser with a broad bubbling surface is required.
For larger hydroponic installations, several ceramic air stones can be positioned in separate pots or reservoirs. A suitably sized air pump and manifold can then distribute air between the individual diffuser lines.
How to use the 100mm Ceramic Air Stone
Connect suitable flexible airline between the ceramic air stone and an appropriately sized external air pump. Place the air stone flat at the bottom of the reservoir, keeping the porous ceramic section submerged.
Switch on the pump and air will pass through the porous surface, producing bubbles throughout the surrounding nutrient solution. Positioning the diffuser low in the reservoir gives those bubbles more distance to travel before reaching the surface.
Keep airline runs free from kinks and restrictions that could reduce airflow. Positioning the air pump above the water level helps protect it against water siphoning back through the airline if the power is switched off.
Product details
| Product type | Ceramic air stone / air diffuser |
|---|---|
| Shape | Round flat disc |
| Diameter | 100mm / 4" |
| Diffuser material | Porous ceramic |
| Compatible airline | 4mm or 8mm internal diameter flexible airline |
| Position | Sits flat at the bottom of a reservoir or tank |
| Typical applications | Hydroponic nutrient reservoirs, DWC systems & aerated water tanks |
| Outer case quantity | 30 |
| Air pump included | No |
| Airline included | No |
100mm Ceramic Air Stone FAQs
What size is this ceramic air stone?
The round ceramic air stone measures 100mm, or approximately 4 inches, in diameter.
What does a flat ceramic air stone do?
Air from an external pump is forced through the porous ceramic surface and released into the surrounding water or nutrient solution as many small bubbles.
What size airline can I use with the 100mm air stone?
The 100mm flat ceramic air stone can accept compatible 4mm or 8mm internal-diameter flexible airline.
Is a 100mm air stone suitable for DWC?
Yes. The compact flat design is particularly useful in DWC buckets and reservoirs where continuous nutrient solution aeration is required.
Where should I position a flat air stone?
Position it flat at the bottom of the reservoir or tank. This keeps the diffuser low in the solution and allows bubbles to rise through the water above it.
Does the ceramic air stone need an air pump?
Yes. The air stone is a diffuser rather than an air source, so it needs to be connected to a suitable external air pump.
Can I use several 100mm air stones from one air pump?
Yes. Multiple air stones can be operated from one sufficiently powerful air pump. A suitable manifold can be used to divide the pump output between the individual airline runs.
What is the difference between a 100mm and 150mm ceramic air stone?
The 100mm version has a more compact 4-inch diffusing surface, making it useful for individual buckets and smaller reservoirs. The 150mm version provides a larger 6-inch diffusing area for broader bubble distribution in bigger reservoirs.
Are the air pump and airline included?
No. The ceramic air stone is supplied separately, allowing the air pump and airline to be selected to suit the aeration system.

The Irrigation Pipe Cutters is designed for cleanly cutting compatible irrigation pipe in professional nursery, greenhouse and horticultural irrigation systems.
Reliable irrigation depends on matching emitters, stakes, pipework and installation tools correctly so water is delivered consistently and connections remain secure.
Key benefits
Clean, repeatable irrigation installation
Use the correct installation tool for the pipe, dripper or fitting being installed. Purpose-designed cutters and punches help create cleaner connections than improvised blades or sharp objects, reducing the risk of distorted pipe and poor seals.
Support the pipe while working, keep hands clear of cutting or punching edges and inspect the finished connection before pressurising the irrigation system.
Commissioning after installation
Once fittings or emitters have been installed, flush the line where appropriate, pressurise the system gradually and check for leakage, restricted flow and secure connections before relying on it for crop irrigation.
Irrigation system management
Good components cannot compensate for poor system design. Size pipework, zones and water supply for the required flow and pressure, and use suitable filtration where emitters or small waterways are vulnerable to debris.
Flush and inspect irrigation systems as appropriate to water quality and crop hygiene requirements.
Maintenance & storage
Inspect components periodically for blockage, wear, leaks or physical damage. Keep installation tools clean and dry between jobs and replace damaged components rather than relying on temporary fixes in production systems.
Irrigation Pipe Cutters product details
| Product type | Irrigation Pipe Cutters |
|---|---|
| Primary use | cleanly cutting compatible irrigation pipe |
| Application | Professional horticultural irrigation |
Irrigation Pipe Cutters FAQs
What is this product used for?
Cleanly cutting compatible irrigation pipe. Is it suitable for professional irrigation systems?
Yes, where the component is compatible with the pipework, emitters and system configuration being used. What should I check before installation?
Confirm component and pipe compatibility, inspect the parts for damage and plan the connection so pipework is not kinked or under unnecessary tension. Should the system be tested after fitting?
Yes. Pressurise or run the irrigation zone and check for leaks, secure connections and expected water delivery. How can I maintain irrigation uniformity?
Inspect representative outlets, maintain filtration and flushing as required and investigate blocked or damaged components promptly. Can one irrigation run time suit every crop?
No. Irrigation duration and frequency depend on crop size, container volume, substrate, weather and emitter output. How should spare components or tools be stored?
Keep them clean, dry and organised so sealing surfaces, cutting edges and small waterways are protected from damage and contamination.
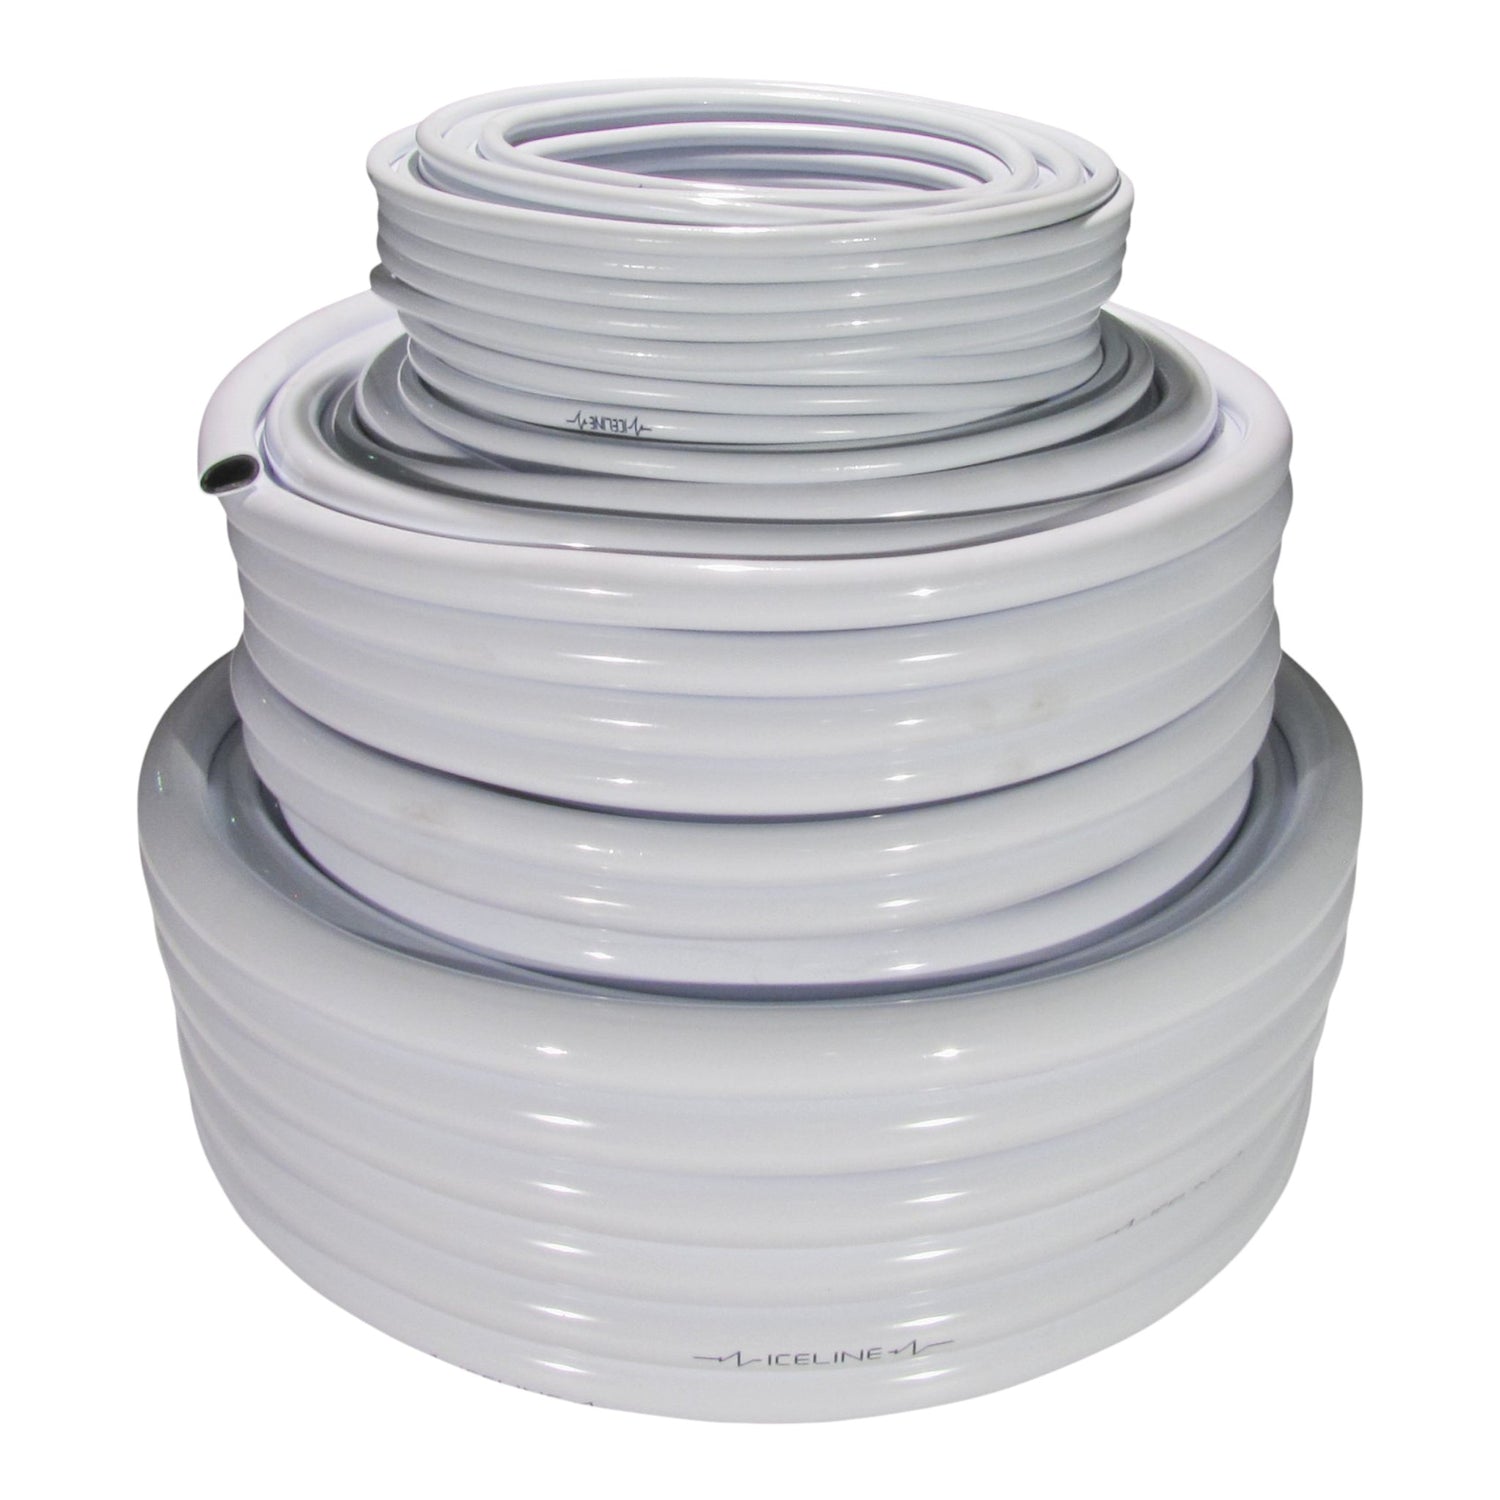
£10.25
Unit price per£10.25
Unit price perThe Cool Pipe Dual-Layer Temperature Control Hose - 4mm x 30m is a dual-layer hose intended for compatible horticultural temperature-control and water-circulation installations.
This 4mm version is supplied in a 30m length and is suited to professional greenhouse, nursery and controlled-environment installations where correctly specified pipework forms part of a wider heating or cooling system.
Key benefits
Temperature-control pipework in horticulture
Water-based heating and cooling systems rely on suitable pipe sizing, flow and layout to transfer energy effectively. Use the 4mm Cool Pipe only where its size and connection method match the design of the complete system.
Pipe diameter affects flow resistance and available water volume, so changing hose size within an existing installation should be considered as part of the hydraulic design rather than treated as a simple substitution.
Planning the installation
Route hose runs to avoid unnecessary restriction, crushing and tight bends. Support pipework where required and protect it from sharp edges, vehicle routes and other sources of physical damage.
Before cutting a 30m coil, plan the route and allow for connections, changes of direction and service access. Clean, square cuts generally make fitting assembly easier and more reliable.
Connections & commissioning
Use fittings specifically compatible with the hose and system. Insert pipe fully into connections and follow the fitting manufacturer's assembly requirements. Do not assume that nominal diameter alone guarantees compatibility between different fitting systems.
After installation, fill and commission the system in a controlled manner and inspect joints for leaks. Confirm circulation through the intended zones before relying on the installation for crop temperature management.
System performance
The hose itself does not determine heating or cooling capacity. Water temperature, flow rate, pump performance, run length, heat-transfer arrangement and environmental conditions all influence the performance of the complete system.
Where temperature control is important to crop quality, monitor the relevant air, root-zone or water temperatures and adjust the complete system rather than relying on fixed operating assumptions.
Maintenance
Inspect accessible hose runs and connections periodically for leakage, abrasion, kinking or physical damage. Investigate unexpected changes in flow or temperature performance and keep pumps, filters and controls maintained according to their own requirements.
Cool Pipe Dual-Layer Temperature Control Hose - 4mm x 30m product details
| Product | Cool Pipe Dual-Layer Temperature Control Hose |
|---|---|
| Stated size | 4mm |
| Length | 30m |
| Construction | Dual-layer |
| Application | Compatible horticultural temperature-control and circulation systems |
| Selling quantity | 1 x 30m coil/length |
Cool Pipe Dual-Layer Temperature Control Hose - 4mm x 30m FAQs
What size is this Cool Pipe?
This version is stated as 4mm. How much hose is supplied?
The supplied length is 30m. What is Cool Pipe used for?
It is intended for compatible horticultural temperature-control and water-circulation installations. Can I substitute one pipe diameter for another?
Not automatically. Pipe diameter affects flow and pressure loss, so the complete system design should be considered. Will any fitting with the same nominal size work?
Do not assume so. Confirm compatibility with the specific hose and fitting system before installation. How should the hose be routed?
Avoid crushing, sharp bends, abrasion and unnecessary restriction, and support or protect runs where required. Should the system be leak-tested?
Yes. Commission the installation carefully and inspect connections before relying on it for crop temperature control. Does the hose determine the system's heating or cooling output?
No. Output depends on the complete system, including water temperature, flow, pump performance, layout and environmental conditions. What maintenance is required?
Inspect hose and fittings for leaks, abrasion or kinks and maintain the pumps, filters and controls used in the wider system.
£43.15
Unit price per£43.15
Unit price perThe Cool Pipe Dual-Layer Temperature Control Hose - 25mm x 30m is a dual-layer hose intended for compatible horticultural temperature-control and water-circulation installations.
This 25mm version is supplied in a 30m length and is suited to professional greenhouse, nursery and controlled-environment installations where correctly specified pipework forms part of a wider heating or cooling system.
Key benefits
Temperature-control pipework in horticulture
Water-based heating and cooling systems rely on suitable pipe sizing, flow and layout to transfer energy effectively. Use the 25mm Cool Pipe only where its size and connection method match the design of the complete system.
Pipe diameter affects flow resistance and available water volume, so changing hose size within an existing installation should be considered as part of the hydraulic design rather than treated as a simple substitution.
Planning the installation
Route hose runs to avoid unnecessary restriction, crushing and tight bends. Support pipework where required and protect it from sharp edges, vehicle routes and other sources of physical damage.
Before cutting a 30m coil, plan the route and allow for connections, changes of direction and service access. Clean, square cuts generally make fitting assembly easier and more reliable.
Connections & commissioning
Use fittings specifically compatible with the hose and system. Insert pipe fully into connections and follow the fitting manufacturer's assembly requirements. Do not assume that nominal diameter alone guarantees compatibility between different fitting systems.
After installation, fill and commission the system in a controlled manner and inspect joints for leaks. Confirm circulation through the intended zones before relying on the installation for crop temperature management.
System performance
The hose itself does not determine heating or cooling capacity. Water temperature, flow rate, pump performance, run length, heat-transfer arrangement and environmental conditions all influence the performance of the complete system.
Where temperature control is important to crop quality, monitor the relevant air, root-zone or water temperatures and adjust the complete system rather than relying on fixed operating assumptions.
Maintenance
Inspect accessible hose runs and connections periodically for leakage, abrasion, kinking or physical damage. Investigate unexpected changes in flow or temperature performance and keep pumps, filters and controls maintained according to their own requirements.
Cool Pipe Dual-Layer Temperature Control Hose - 25mm x 30m product details
| Product | Cool Pipe Dual-Layer Temperature Control Hose |
|---|---|
| Stated size | 25mm |
| Length | 30m |
| Construction | Dual-layer |
| Application | Compatible horticultural temperature-control and circulation systems |
| Selling quantity | 1 x 30m coil/length |
Cool Pipe Dual-Layer Temperature Control Hose - 25mm x 30m FAQs
What size is this Cool Pipe?
This version is stated as 25mm. How much hose is supplied?
The supplied length is 30m. What is Cool Pipe used for?
It is intended for compatible horticultural temperature-control and water-circulation installations. Can I substitute one pipe diameter for another?
Not automatically. Pipe diameter affects flow and pressure loss, so the complete system design should be considered. Will any fitting with the same nominal size work?
Do not assume so. Confirm compatibility with the specific hose and fitting system before installation. How should the hose be routed?
Avoid crushing, sharp bends, abrasion and unnecessary restriction, and support or protect runs where required. Should the system be leak-tested?
Yes. Commission the installation carefully and inspect connections before relying on it for crop temperature control. Does the hose determine the system's heating or cooling output?
No. Output depends on the complete system, including water temperature, flow, pump performance, layout and environmental conditions. What maintenance is required?
Inspect hose and fittings for leaks, abrasion or kinks and maintain the pumps, filters and controls used in the wider system.
£35.70
Unit price per£35.70
Unit price perThe Cool Pipe Dual-Layer Temperature Control Hose - 19mm x 30m is a dual-layer hose intended for compatible horticultural temperature-control and water-circulation installations.
This 19mm version is supplied in a 30m length and is suited to professional greenhouse, nursery and controlled-environment installations where correctly specified pipework forms part of a wider heating or cooling system.
Key benefits
Temperature-control pipework in horticulture
Water-based heating and cooling systems rely on suitable pipe sizing, flow and layout to transfer energy effectively. Use the 19mm Cool Pipe only where its size and connection method match the design of the complete system.
Pipe diameter affects flow resistance and available water volume, so changing hose size within an existing installation should be considered as part of the hydraulic design rather than treated as a simple substitution.
Planning the installation
Route hose runs to avoid unnecessary restriction, crushing and tight bends. Support pipework where required and protect it from sharp edges, vehicle routes and other sources of physical damage.
Before cutting a 30m coil, plan the route and allow for connections, changes of direction and service access. Clean, square cuts generally make fitting assembly easier and more reliable.
Connections & commissioning
Use fittings specifically compatible with the hose and system. Insert pipe fully into connections and follow the fitting manufacturer's assembly requirements. Do not assume that nominal diameter alone guarantees compatibility between different fitting systems.
After installation, fill and commission the system in a controlled manner and inspect joints for leaks. Confirm circulation through the intended zones before relying on the installation for crop temperature management.
System performance
The hose itself does not determine heating or cooling capacity. Water temperature, flow rate, pump performance, run length, heat-transfer arrangement and environmental conditions all influence the performance of the complete system.
Where temperature control is important to crop quality, monitor the relevant air, root-zone or water temperatures and adjust the complete system rather than relying on fixed operating assumptions.
Maintenance
Inspect accessible hose runs and connections periodically for leakage, abrasion, kinking or physical damage. Investigate unexpected changes in flow or temperature performance and keep pumps, filters and controls maintained according to their own requirements.
Cool Pipe Dual-Layer Temperature Control Hose - 19mm x 30m product details
| Product | Cool Pipe Dual-Layer Temperature Control Hose |
|---|---|
| Stated size | 19mm |
| Length | 30m |
| Construction | Dual-layer |
| Application | Compatible horticultural temperature-control and circulation systems |
| Selling quantity | 1 x 30m coil/length |
Cool Pipe Dual-Layer Temperature Control Hose - 19mm x 30m FAQs
What size is this Cool Pipe?
This version is stated as 19mm. How much hose is supplied?
The supplied length is 30m. What is Cool Pipe used for?
It is intended for compatible horticultural temperature-control and water-circulation installations. Can I substitute one pipe diameter for another?
Not automatically. Pipe diameter affects flow and pressure loss, so the complete system design should be considered. Will any fitting with the same nominal size work?
Do not assume so. Confirm compatibility with the specific hose and fitting system before installation. How should the hose be routed?
Avoid crushing, sharp bends, abrasion and unnecessary restriction, and support or protect runs where required. Should the system be leak-tested?
Yes. Commission the installation carefully and inspect connections before relying on it for crop temperature control. Does the hose determine the system's heating or cooling output?
No. Output depends on the complete system, including water temperature, flow, pump performance, layout and environmental conditions. What maintenance is required?
Inspect hose and fittings for leaks, abrasion or kinks and maintain the pumps, filters and controls used in the wider system.
£21.50
Unit price per£21.50
Unit price perThe Cool Pipe Dual-Layer Temperature Control Hose - 13mm x 30m is a dual-layer hose intended for compatible horticultural temperature-control and water-circulation installations.
This 13mm version is supplied in a 30m length and is suited to professional greenhouse, nursery and controlled-environment installations where correctly specified pipework forms part of a wider heating or cooling system.
Key benefits
Temperature-control pipework in horticulture
Water-based heating and cooling systems rely on suitable pipe sizing, flow and layout to transfer energy effectively. Use the 13mm Cool Pipe only where its size and connection method match the design of the complete system.
Pipe diameter affects flow resistance and available water volume, so changing hose size within an existing installation should be considered as part of the hydraulic design rather than treated as a simple substitution.
Planning the installation
Route hose runs to avoid unnecessary restriction, crushing and tight bends. Support pipework where required and protect it from sharp edges, vehicle routes and other sources of physical damage.
Before cutting a 30m coil, plan the route and allow for connections, changes of direction and service access. Clean, square cuts generally make fitting assembly easier and more reliable.
Connections & commissioning
Use fittings specifically compatible with the hose and system. Insert pipe fully into connections and follow the fitting manufacturer's assembly requirements. Do not assume that nominal diameter alone guarantees compatibility between different fitting systems.
After installation, fill and commission the system in a controlled manner and inspect joints for leaks. Confirm circulation through the intended zones before relying on the installation for crop temperature management.
System performance
The hose itself does not determine heating or cooling capacity. Water temperature, flow rate, pump performance, run length, heat-transfer arrangement and environmental conditions all influence the performance of the complete system.
Where temperature control is important to crop quality, monitor the relevant air, root-zone or water temperatures and adjust the complete system rather than relying on fixed operating assumptions.
Maintenance
Inspect accessible hose runs and connections periodically for leakage, abrasion, kinking or physical damage. Investigate unexpected changes in flow or temperature performance and keep pumps, filters and controls maintained according to their own requirements.
Cool Pipe Dual-Layer Temperature Control Hose - 13mm x 30m product details
| Product | Cool Pipe Dual-Layer Temperature Control Hose |
|---|---|
| Stated size | 13mm |
| Length | 30m |
| Construction | Dual-layer |
| Application | Compatible horticultural temperature-control and circulation systems |
| Selling quantity | 1 x 30m coil/length |
Cool Pipe Dual-Layer Temperature Control Hose - 13mm x 30m FAQs
What size is this Cool Pipe?
This version is stated as 13mm. How much hose is supplied?
The supplied length is 30m. What is Cool Pipe used for?
It is intended for compatible horticultural temperature-control and water-circulation installations. Can I substitute one pipe diameter for another?
Not automatically. Pipe diameter affects flow and pressure loss, so the complete system design should be considered. Will any fitting with the same nominal size work?
Do not assume so. Confirm compatibility with the specific hose and fitting system before installation. How should the hose be routed?
Avoid crushing, sharp bends, abrasion and unnecessary restriction, and support or protect runs where required. Should the system be leak-tested?
Yes. Commission the installation carefully and inspect connections before relying on it for crop temperature control. Does the hose determine the system's heating or cooling output?
No. Output depends on the complete system, including water temperature, flow, pump performance, layout and environmental conditions. What maintenance is required?
Inspect hose and fittings for leaks, abrasion or kinks and maintain the pumps, filters and controls used in the wider system.
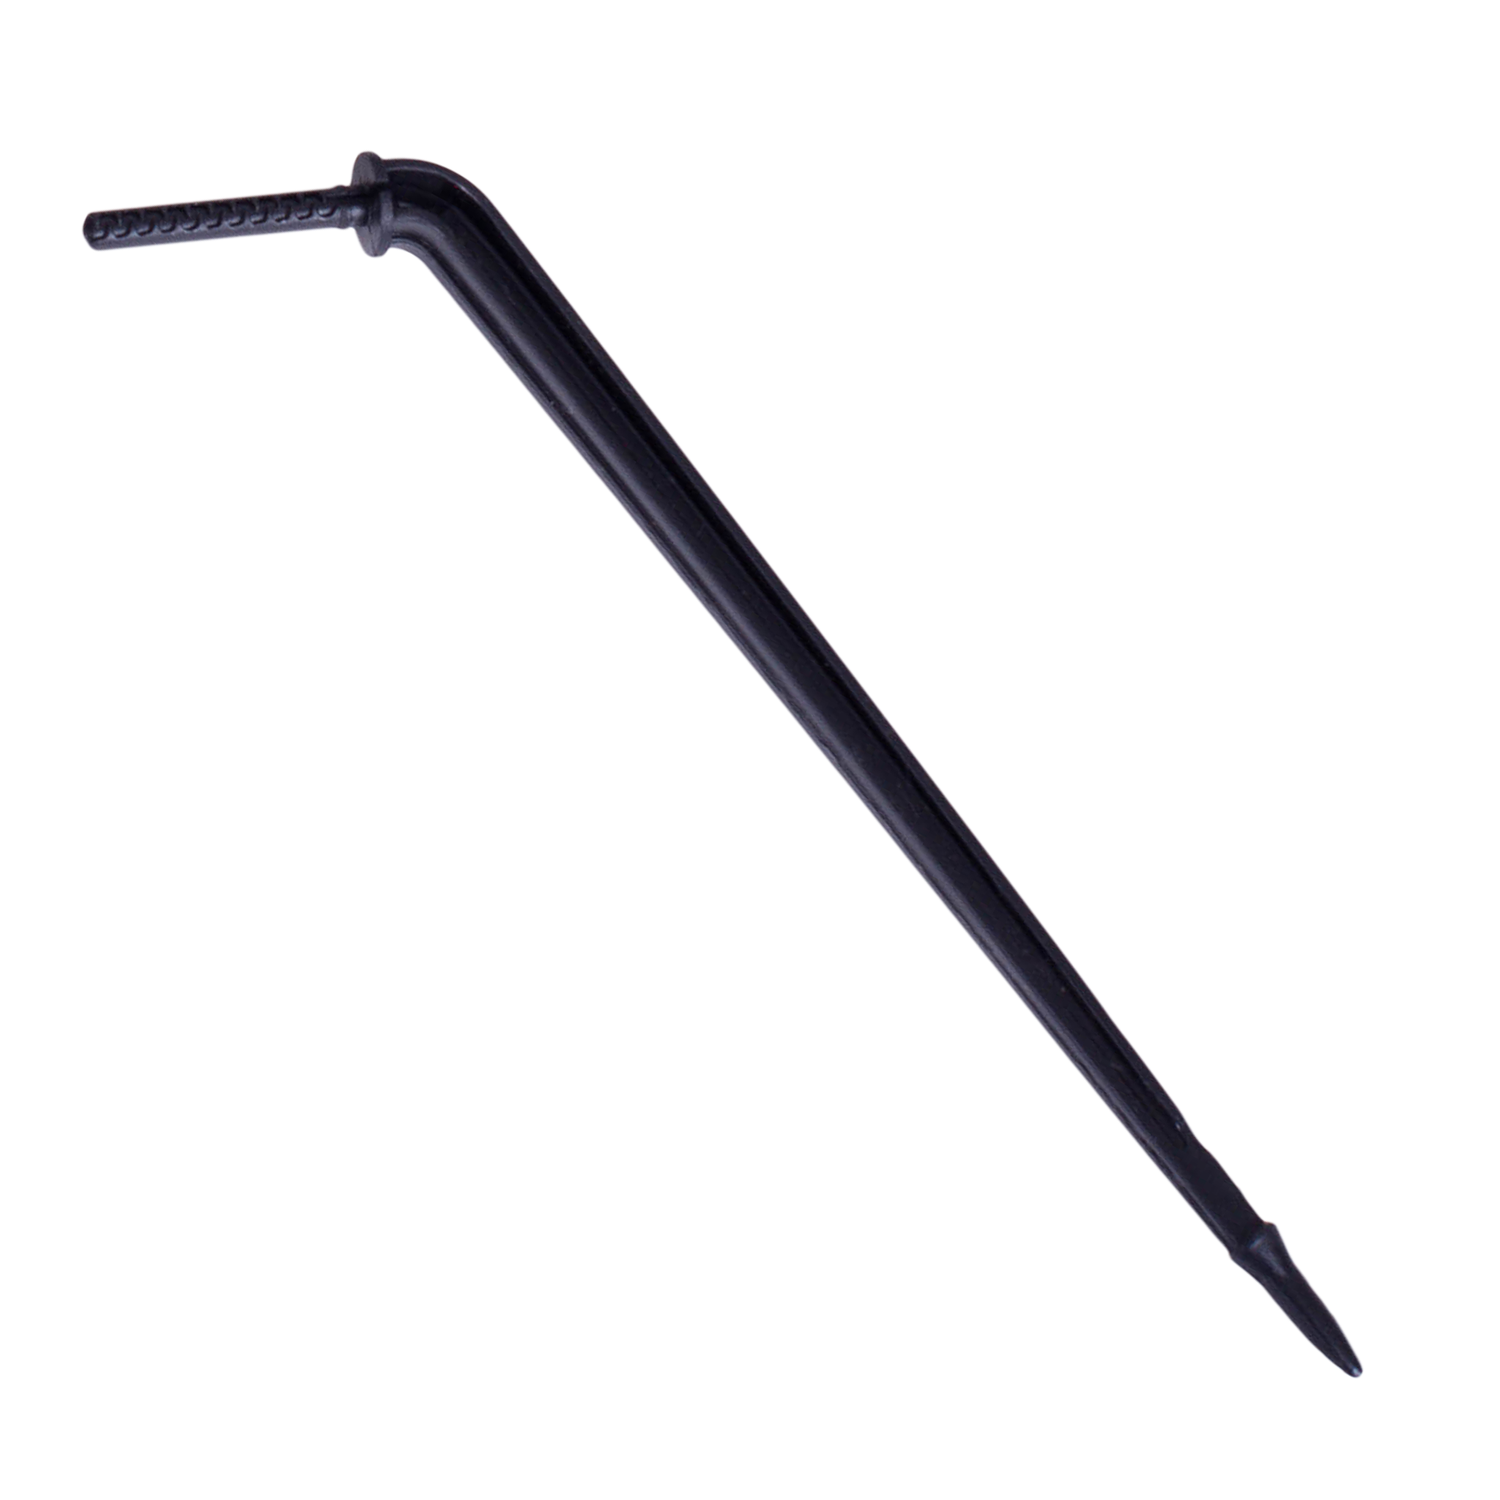
The Blue Fast-Flow Dripper Stake is designed for delivering irrigation water at the pot or plant position in professional nursery, greenhouse and horticultural irrigation systems.
Reliable irrigation depends on matching emitters, stakes, pipework and installation tools correctly so water is delivered consistently and connections remain secure.
Key benefits
Point irrigation at container level
Dripper stakes position the water outlet close to the crop root zone, helping keep individual container irrigation organised. Insert the stake securely without damaging important roots and route the connected microtube so it is not kinked or under tension.
Actual delivered water depends on the upstream dripper, pressure, pipework and system design. Where a flow figure is stated for the product, verify irrigation uniformity under the operating conditions of the complete system.
Checking irrigation uniformity
Periodically compare output across representative pots, particularly at the beginning and end of irrigation lines. Investigate blocked outlets, damaged tube, pressure differences or displaced stakes if crop moisture becomes uneven.
Irrigation system management
Good components cannot compensate for poor system design. Size pipework, zones and water supply for the required flow and pressure, and use suitable filtration where emitters or small waterways are vulnerable to debris.
Flush and inspect irrigation systems as appropriate to water quality and crop hygiene requirements.
Maintenance & storage
Inspect components periodically for blockage, wear, leaks or physical damage. Keep installation tools clean and dry between jobs and replace damaged components rather than relying on temporary fixes in production systems.
Blue Fast-Flow Dripper Stake product details
| Product type | Blue Fast-Flow Dripper Stake |
|---|---|
| Primary use | delivering irrigation water at the pot or plant position |
| Application | Professional horticultural irrigation |
Blue Fast-Flow Dripper Stake FAQs
What is this product used for?
Delivering irrigation water at the pot or plant position. Is it suitable for professional irrigation systems?
Yes, where the component is compatible with the pipework, emitters and system configuration being used. What should I check before installation?
Confirm component and pipe compatibility, inspect the parts for damage and plan the connection so pipework is not kinked or under unnecessary tension. Should the system be tested after fitting?
Yes. Pressurise or run the irrigation zone and check for leaks, secure connections and expected water delivery. How can I maintain irrigation uniformity?
Inspect representative outlets, maintain filtration and flushing as required and investigate blocked or damaged components promptly. Can one irrigation run time suit every crop?
No. Irrigation duration and frequency depend on crop size, container volume, substrate, weather and emitter output. How should spare components or tools be stored?
Keep them clean, dry and organised so sealing surfaces, cutting edges and small waterways are protected from damage and contamination. Where should the stake be positioned?
Place it securely in the container or root-zone area so water reaches the growing medium without the tube being kinked or strained.
The 2L/h Black Dripper Stake is designed for delivering irrigation water at the pot or plant position in professional nursery, greenhouse and horticultural irrigation systems.
Reliable irrigation depends on matching emitters, stakes, pipework and installation tools correctly so water is delivered consistently and connections remain secure.
Key benefits
Point irrigation at container level
Dripper stakes position the water outlet close to the crop root zone, helping keep individual container irrigation organised. Insert the stake securely without damaging important roots and route the connected microtube so it is not kinked or under tension.
Actual delivered water depends on the upstream dripper, pressure, pipework and system design. Where a flow figure is stated for the product, verify irrigation uniformity under the operating conditions of the complete system.
Checking irrigation uniformity
Periodically compare output across representative pots, particularly at the beginning and end of irrigation lines. Investigate blocked outlets, damaged tube, pressure differences or displaced stakes if crop moisture becomes uneven.
Irrigation system management
Good components cannot compensate for poor system design. Size pipework, zones and water supply for the required flow and pressure, and use suitable filtration where emitters or small waterways are vulnerable to debris.
Flush and inspect irrigation systems as appropriate to water quality and crop hygiene requirements.
Maintenance & storage
Inspect components periodically for blockage, wear, leaks or physical damage. Keep installation tools clean and dry between jobs and replace damaged components rather than relying on temporary fixes in production systems.
2L/h Black Dripper Stake product details
| Product type | 2L/h Black Dripper Stake |
|---|---|
| Primary use | delivering irrigation water at the pot or plant position |
| Application | Professional horticultural irrigation |
| Stated flow | 2L/h |
2L/h Black Dripper Stake FAQs
What is this product used for?
Delivering irrigation water at the pot or plant position. Is it suitable for professional irrigation systems?
Yes, where the component is compatible with the pipework, emitters and system configuration being used. What should I check before installation?
Confirm component and pipe compatibility, inspect the parts for damage and plan the connection so pipework is not kinked or under unnecessary tension. Should the system be tested after fitting?
Yes. Pressurise or run the irrigation zone and check for leaks, secure connections and expected water delivery. How can I maintain irrigation uniformity?
Inspect representative outlets, maintain filtration and flushing as required and investigate blocked or damaged components promptly. Can one irrigation run time suit every crop?
No. Irrigation duration and frequency depend on crop size, container volume, substrate, weather and emitter output. How should spare components or tools be stored?
Keep them clean, dry and organised so sealing surfaces, cutting edges and small waterways are protected from damage and contamination. Where should the stake be positioned?
Place it securely in the container or root-zone area so water reaches the growing medium without the tube being kinked or strained. Does 2L/h guarantee exactly 2 litres every hour in every installation?
It is the stated nominal flow. Actual delivery should be checked under the pressure and configuration of the complete irrigation system.

The Creation Pro 25mm Washer is a 25mm irrigation component designed for sealing a compatible Creation Pro 25mm fitting assembly.
Creation Pro fittings are intended for building and maintaining organised horticultural water-distribution pipework where compatible components are assembled correctly and checked under operating pressure.
Key benefits
Maintaining a reliable fitting seal
The washer forms part of a compatible Creation Pro fitting assembly and should be clean, correctly seated and free from damage before the joint is tightened. A distorted, contaminated or worn sealing component can contribute to leakage.
When servicing an existing fitting, inspect the mating surfaces as well as the washer rather than automatically tightening the joint further.
Installing 25mm irrigation fittings
Use clean, compatible 25mm pipe and cut ends squarely with an appropriate pipe cutter. Remove dirt and damaged material from the connection area and assemble all components in the correct order.
Route pipework to avoid unnecessary tension, sharp bends and unsupported weight at fittings. Where lines cross working areas, protect them from vehicle, trolley or foot traffic.
Commissioning & leak checks
After assembly, pressurise the irrigation system gradually and inspect every new joint. Check for visible leakage, pipe movement and correct downstream water delivery before putting the zone into routine crop use.
A leak should be investigated by safely depressurising and inspecting the joint; repeated overtightening can damage components rather than solve an assembly problem.
System design & maintenance
Pipe size and fittings are only part of irrigation design. Available pressure, total flow demand, run length, elevation and downstream emitters all influence system performance. Expansion of an existing system should take these factors into account.
Inspect fittings periodically and replace cracked, distorted or damaged components. Keep spare washers, nuts and fittings clean so sealing surfaces are not contaminated before installation.
Creation Pro 25mm Washer product details
| Range | Creation Pro |
|---|---|
| Product type | Sealing washer |
| Nominal size | 25mm |
| Primary use | sealing a compatible Creation Pro 25mm fitting assembly |
| Application | Professional horticultural irrigation |
Creation Pro 25mm Washer FAQs
What size is this fitting?
It is a 25mm Creation Pro irrigation component. What is it used for?
Sealing a compatible creation pro 25mm fitting assembly. Can it be used with any 25mm pipe?
Confirm pipe and fitting compatibility before installation; the same nominal diameter does not by itself guarantee that every product range uses the same connection system. How should irrigation pipe be prepared?
Cut it squarely with a suitable pipe cutter and make sure the connection area is clean and undamaged. Should the joint be tested after assembly?
Yes. Pressurise the system gradually and check the completed connection for leaks and movement. What should I do if a fitting leaks?
Depressurise the system and inspect pipe insertion, sealing components and fitting condition rather than simply applying more force. Can I add branches without checking system capacity?
No. Additional branches and outlets increase flow demand, so consider water supply, pressure, pipe sizing and the complete irrigation layout. How should spare fittings be stored?
Keep them clean and protected so threads, sealing surfaces and small components are not damaged or contaminated.

The Creation Pro 25mm Tee is a 25mm irrigation component designed for creating a branch connection in compatible 25mm irrigation pipework.
Creation Pro fittings are intended for building and maintaining organised horticultural water-distribution pipework where compatible components are assembled correctly and checked under operating pressure.
Key benefits
Creating a branch in the irrigation line
Use the tee to divide a compatible 25mm pipe run into a branch. When adding a branch, consider the additional downstream flow demand rather than assuming the existing supply and pipework can support any number of new outlets.
Plan the tee position so all three connected pipe sections are supported and can be serviced without excessive strain.
Installing 25mm irrigation fittings
Use clean, compatible 25mm pipe and cut ends squarely with an appropriate pipe cutter. Remove dirt and damaged material from the connection area and assemble all components in the correct order.
Route pipework to avoid unnecessary tension, sharp bends and unsupported weight at fittings. Where lines cross working areas, protect them from vehicle, trolley or foot traffic.
Commissioning & leak checks
After assembly, pressurise the irrigation system gradually and inspect every new joint. Check for visible leakage, pipe movement and correct downstream water delivery before putting the zone into routine crop use.
A leak should be investigated by safely depressurising and inspecting the joint; repeated overtightening can damage components rather than solve an assembly problem.
System design & maintenance
Pipe size and fittings are only part of irrigation design. Available pressure, total flow demand, run length, elevation and downstream emitters all influence system performance. Expansion of an existing system should take these factors into account.
Inspect fittings periodically and replace cracked, distorted or damaged components. Keep spare washers, nuts and fittings clean so sealing surfaces are not contaminated before installation.
Creation Pro 25mm Tee product details
| Range | Creation Pro |
|---|---|
| Product type | Tee fitting |
| Nominal size | 25mm |
| Primary use | creating a branch connection in compatible 25mm irrigation pipework |
| Application | Professional horticultural irrigation |
Creation Pro 25mm Tee FAQs
What size is this fitting?
It is a 25mm Creation Pro irrigation component. What is it used for?
Creating a branch connection in compatible 25mm irrigation pipework. Can it be used with any 25mm pipe?
Confirm pipe and fitting compatibility before installation; the same nominal diameter does not by itself guarantee that every product range uses the same connection system. How should irrigation pipe be prepared?
Cut it squarely with a suitable pipe cutter and make sure the connection area is clean and undamaged. Should the joint be tested after assembly?
Yes. Pressurise the system gradually and check the completed connection for leaks and movement. What should I do if a fitting leaks?
Depressurise the system and inspect pipe insertion, sealing components and fitting condition rather than simply applying more force. Can I add branches without checking system capacity?
No. Additional branches and outlets increase flow demand, so consider water supply, pressure, pipe sizing and the complete irrigation layout. How should spare fittings be stored?
Keep them clean and protected so threads, sealing surfaces and small components are not damaged or contaminated.

The Creation Pro 25mm Straight Connector is a 25mm irrigation component designed for joining two compatible 25mm irrigation pipe sections in a straight run.
Creation Pro fittings are intended for building and maintaining organised horticultural water-distribution pipework where compatible components are assembled correctly and checked under operating pressure.
Key benefits
Joining straight pipe runs
Use the straight connector where two compatible 25mm pipe sections need to continue on the same alignment. Cut pipe ends squarely, remove obvious damage or debris and insert the pipe fully into the fitting before securing the assembly.
A straight joint should not be used to compensate for poor pipe alignment or a forced bend; support the pipework so the connection is not under constant side load.
Installing 25mm irrigation fittings
Use clean, compatible 25mm pipe and cut ends squarely with an appropriate pipe cutter. Remove dirt and damaged material from the connection area and assemble all components in the correct order.
Route pipework to avoid unnecessary tension, sharp bends and unsupported weight at fittings. Where lines cross working areas, protect them from vehicle, trolley or foot traffic.
Commissioning & leak checks
After assembly, pressurise the irrigation system gradually and inspect every new joint. Check for visible leakage, pipe movement and correct downstream water delivery before putting the zone into routine crop use.
A leak should be investigated by safely depressurising and inspecting the joint; repeated overtightening can damage components rather than solve an assembly problem.
System design & maintenance
Pipe size and fittings are only part of irrigation design. Available pressure, total flow demand, run length, elevation and downstream emitters all influence system performance. Expansion of an existing system should take these factors into account.
Inspect fittings periodically and replace cracked, distorted or damaged components. Keep spare washers, nuts and fittings clean so sealing surfaces are not contaminated before installation.
Creation Pro 25mm Straight Connector product details
| Range | Creation Pro |
|---|---|
| Product type | Straight connector |
| Nominal size | 25mm |
| Primary use | joining two compatible 25mm irrigation pipe sections in a straight run |
| Application | Professional horticultural irrigation |
Creation Pro 25mm Straight Connector FAQs
What size is this fitting?
It is a 25mm Creation Pro irrigation component. What is it used for?
Joining two compatible 25mm irrigation pipe sections in a straight run. Can it be used with any 25mm pipe?
Confirm pipe and fitting compatibility before installation; the same nominal diameter does not by itself guarantee that every product range uses the same connection system. How should irrigation pipe be prepared?
Cut it squarely with a suitable pipe cutter and make sure the connection area is clean and undamaged. Should the joint be tested after assembly?
Yes. Pressurise the system gradually and check the completed connection for leaks and movement. What should I do if a fitting leaks?
Depressurise the system and inspect pipe insertion, sealing components and fitting condition rather than simply applying more force. Can I add branches without checking system capacity?
No. Additional branches and outlets increase flow demand, so consider water supply, pressure, pipe sizing and the complete irrigation layout. How should spare fittings be stored?
Keep them clean and protected so threads, sealing surfaces and small components are not damaged or contaminated.

The Creation Pro 25mm Nut is a 25mm irrigation component designed for securing a compatible Creation Pro 25mm fitting assembly.
Creation Pro fittings are intended for building and maintaining organised horticultural water-distribution pipework where compatible components are assembled correctly and checked under operating pressure.
Key benefits
Securing a compatible fitting assembly
The nut is used as part of a compatible Creation Pro 25mm fitting. Start threads or retaining features squarely and tighten the assembly according to the fitting design rather than using excessive force.
If a joint leaks, depressurise it and inspect pipe insertion, sealing components and fitting condition instead of simply overtightening the nut.
Installing 25mm irrigation fittings
Use clean, compatible 25mm pipe and cut ends squarely with an appropriate pipe cutter. Remove dirt and damaged material from the connection area and assemble all components in the correct order.
Route pipework to avoid unnecessary tension, sharp bends and unsupported weight at fittings. Where lines cross working areas, protect them from vehicle, trolley or foot traffic.
Commissioning & leak checks
After assembly, pressurise the irrigation system gradually and inspect every new joint. Check for visible leakage, pipe movement and correct downstream water delivery before putting the zone into routine crop use.
A leak should be investigated by safely depressurising and inspecting the joint; repeated overtightening can damage components rather than solve an assembly problem.
System design & maintenance
Pipe size and fittings are only part of irrigation design. Available pressure, total flow demand, run length, elevation and downstream emitters all influence system performance. Expansion of an existing system should take these factors into account.
Inspect fittings periodically and replace cracked, distorted or damaged components. Keep spare washers, nuts and fittings clean so sealing surfaces are not contaminated before installation.
Creation Pro 25mm Nut product details
| Range | Creation Pro |
|---|---|
| Product type | Compression/retaining nut |
| Nominal size | 25mm |
| Primary use | securing a compatible Creation Pro 25mm fitting assembly |
| Application | Professional horticultural irrigation |
Creation Pro 25mm Nut FAQs
What size is this fitting?
It is a 25mm Creation Pro irrigation component. What is it used for?
Securing a compatible creation pro 25mm fitting assembly. Can it be used with any 25mm pipe?
Confirm pipe and fitting compatibility before installation; the same nominal diameter does not by itself guarantee that every product range uses the same connection system. How should irrigation pipe be prepared?
Cut it squarely with a suitable pipe cutter and make sure the connection area is clean and undamaged. Should the joint be tested after assembly?
Yes. Pressurise the system gradually and check the completed connection for leaks and movement. What should I do if a fitting leaks?
Depressurise the system and inspect pipe insertion, sealing components and fitting condition rather than simply applying more force. Can I add branches without checking system capacity?
No. Additional branches and outlets increase flow demand, so consider water supply, pressure, pipe sizing and the complete irrigation layout. How should spare fittings be stored?
Keep them clean and protected so threads, sealing surfaces and small components are not damaged or contaminated.

The Creation Pro 25mm Elbow is a 25mm irrigation component designed for creating a 90-degree change of direction in compatible 25mm irrigation pipework.
Creation Pro fittings are intended for building and maintaining organised horticultural water-distribution pipework where compatible components are assembled correctly and checked under operating pressure.
Key benefits
Changing pipe direction cleanly
Use the elbow to route compatible 25mm pipework through a right-angle change of direction without forcing the pipe into an excessively tight bend. This can help create tidier irrigation layouts around benches, beds and fixed structures.
Allow enough pipe length on both sides of the elbow so the connection can seat fully without tension.
Installing 25mm irrigation fittings
Use clean, compatible 25mm pipe and cut ends squarely with an appropriate pipe cutter. Remove dirt and damaged material from the connection area and assemble all components in the correct order.
Route pipework to avoid unnecessary tension, sharp bends and unsupported weight at fittings. Where lines cross working areas, protect them from vehicle, trolley or foot traffic.
Commissioning & leak checks
After assembly, pressurise the irrigation system gradually and inspect every new joint. Check for visible leakage, pipe movement and correct downstream water delivery before putting the zone into routine crop use.
A leak should be investigated by safely depressurising and inspecting the joint; repeated overtightening can damage components rather than solve an assembly problem.
System design & maintenance
Pipe size and fittings are only part of irrigation design. Available pressure, total flow demand, run length, elevation and downstream emitters all influence system performance. Expansion of an existing system should take these factors into account.
Inspect fittings periodically and replace cracked, distorted or damaged components. Keep spare washers, nuts and fittings clean so sealing surfaces are not contaminated before installation.
Creation Pro 25mm Elbow product details
| Range | Creation Pro |
|---|---|
| Product type | Elbow fitting |
| Nominal size | 25mm |
| Primary use | creating a 90-degree change of direction in compatible 25mm irrigation pipework |
| Application | Professional horticultural irrigation |
Creation Pro 25mm Elbow FAQs
What size is this fitting?
It is a 25mm Creation Pro irrigation component. What is it used for?
Creating a 90-degree change of direction in compatible 25mm irrigation pipework. Can it be used with any 25mm pipe?
Confirm pipe and fitting compatibility before installation; the same nominal diameter does not by itself guarantee that every product range uses the same connection system. How should irrigation pipe be prepared?
Cut it squarely with a suitable pipe cutter and make sure the connection area is clean and undamaged. Should the joint be tested after assembly?
Yes. Pressurise the system gradually and check the completed connection for leaks and movement. What should I do if a fitting leaks?
Depressurise the system and inspect pipe insertion, sealing components and fitting condition rather than simply applying more force. Can I add branches without checking system capacity?
No. Additional branches and outlets increase flow demand, so consider water supply, pressure, pipe sizing and the complete irrigation layout. How should spare fittings be stored?
Keep them clean and protected so threads, sealing surfaces and small components are not damaged or contaminated.
The Irrigation Back-Plate Elbow is designed for forming a compatible right-angle irrigation connection in professional nursery, greenhouse and horticultural irrigation systems.
Reliable irrigation depends on matching emitters, stakes, pipework and installation tools correctly so water is delivered consistently and connections remain secure.
Key benefits
Building reliable irrigation connections
Use the fitting only with compatible pipework and connection sizes. Cut pipe squarely where required, seat the fitting fully and avoid side-loading connections with tight bends or unsupported pipe.
After installation, pressurise the system and inspect the joint for leakage before putting the irrigation zone into routine service.
Irrigation system management
Good components cannot compensate for poor system design. Size pipework, zones and water supply for the required flow and pressure, and use suitable filtration where emitters or small waterways are vulnerable to debris.
Flush and inspect irrigation systems as appropriate to water quality and crop hygiene requirements.
Maintenance & storage
Inspect components periodically for blockage, wear, leaks or physical damage. Keep installation tools clean and dry between jobs and replace damaged components rather than relying on temporary fixes in production systems.
Irrigation Back-Plate Elbow product details
| Product type | Irrigation Back-Plate Elbow |
|---|---|
| Primary use | forming a compatible right-angle irrigation connection |
| Application | Professional horticultural irrigation |
Irrigation Back-Plate Elbow FAQs
What is this product used for?
Forming a compatible right-angle irrigation connection. Is it suitable for professional irrigation systems?
Yes, where the component is compatible with the pipework, emitters and system configuration being used. What should I check before installation?
Confirm component and pipe compatibility, inspect the parts for damage and plan the connection so pipework is not kinked or under unnecessary tension. Should the system be tested after fitting?
Yes. Pressurise or run the irrigation zone and check for leaks, secure connections and expected water delivery. How can I maintain irrigation uniformity?
Inspect representative outlets, maintain filtration and flushing as required and investigate blocked or damaged components promptly. Can one irrigation run time suit every crop?
No. Irrigation duration and frequency depend on crop size, container volume, substrate, weather and emitter output. How should spare components or tools be stored?
Keep them clean, dry and organised so sealing surfaces, cutting edges and small waterways are protected from damage and contamination.
£0.44
Unit price per£0.44
Unit price perThe Ottima 360 - On Stake - In Line Adjustable 0-40lph is a practical horticultural accessory designed for general horticultural work.
It is suited to routine horticultural work in nurseries, greenhouses, garden centres and gardens where a straightforward accessory is required.
Key benefits
How to use it
Use this product for general horticultural work. Select the size and format to suit the plant, container or growing area and check its position periodically as plants develop.
For professional & garden use
This accessory can be used for individual plants and displays or incorporated into larger nursery, landscaping and retail programmes.
Ottima 360 - On Stake - In Line Adjustable 0-40lph product details
| Supplier | Creation Horticulture |
|---|---|
| Product type | Horticultural accessory |
| Primary use | general horticultural work |
Ottima 360 - On Stake - In Line Adjustable 0-40lph FAQs
What is this product used for?
It is designed for general horticultural work. Who is it suitable for?
It is suitable for professional growers, nurseries, garden centres and gardeners where its size and function match the task. How do I choose the right size?
Check the stated dimensions against the plant, container or working area before ordering. Can it be reused?
Reuse depends on the product material, condition and hygiene requirements. Inspect and clean it as appropriate before reuse.
£0.44
Unit price per£0.44
Unit price perThe Ottima 360 - On Stake - End Line Adjustable 0-40lph is a practical horticultural accessory designed for general horticultural work.
It is suited to routine horticultural work in nurseries, greenhouses, garden centres and gardens where a straightforward accessory is required.
Key benefits
How to use it
Use this product for general horticultural work. Select the size and format to suit the plant, container or growing area and check its position periodically as plants develop.
For professional & garden use
This accessory can be used for individual plants and displays or incorporated into larger nursery, landscaping and retail programmes.
Ottima 360 - On Stake - End Line Adjustable 0-40lph product details
| Supplier | Creation Horticulture |
|---|---|
| Product type | Horticultural accessory |
| Primary use | general horticultural work |
Ottima 360 - On Stake - End Line Adjustable 0-40lph FAQs
What is this product used for?
It is designed for general horticultural work. Who is it suitable for?
It is suitable for professional growers, nurseries, garden centres and gardeners where its size and function match the task. How do I choose the right size?
Check the stated dimensions against the plant, container or working area before ordering. Can it be reused?
Reuse depends on the product material, condition and hygiene requirements. Inspect and clean it as appropriate before reuse.
The Maxima - On stake - End Line 0-90lph is a practical horticultural accessory designed for general horticultural work.
It is suited to routine horticultural work in nurseries, greenhouses, garden centres and gardens where a straightforward accessory is required.
Key benefits
How to use it
Use this product for general horticultural work. Select the size and format to suit the plant, container or growing area and check its position periodically as plants develop.
For professional & garden use
This accessory can be used for individual plants and displays or incorporated into larger nursery, landscaping and retail programmes.
Maxima - On stake - End Line 0-90lph product details
| Supplier | Creation Horticulture |
|---|---|
| Product type | Horticultural accessory |
| Primary use | general horticultural work |
Maxima - On stake - End Line 0-90lph FAQs
What is this product used for?
It is designed for general horticultural work. Who is it suitable for?
It is suitable for professional growers, nurseries, garden centres and gardeners where its size and function match the task. How do I choose the right size?
Check the stated dimensions against the plant, container or working area before ordering. Can it be reused?
Reuse depends on the product material, condition and hygiene requirements. Inspect and clean it as appropriate before reuse.
The Arrow-S Dripper Stake is designed for delivering irrigation water at the pot or plant position in professional nursery, greenhouse and horticultural irrigation systems.
Reliable irrigation depends on matching emitters, stakes, pipework and installation tools correctly so water is delivered consistently and connections remain secure.
Key benefits
Point irrigation at container level
Dripper stakes position the water outlet close to the crop root zone, helping keep individual container irrigation organised. Insert the stake securely without damaging important roots and route the connected microtube so it is not kinked or under tension.
Actual delivered water depends on the upstream dripper, pressure, pipework and system design. Where a flow figure is stated for the product, verify irrigation uniformity under the operating conditions of the complete system.
Checking irrigation uniformity
Periodically compare output across representative pots, particularly at the beginning and end of irrigation lines. Investigate blocked outlets, damaged tube, pressure differences or displaced stakes if crop moisture becomes uneven.
Irrigation system management
Good components cannot compensate for poor system design. Size pipework, zones and water supply for the required flow and pressure, and use suitable filtration where emitters or small waterways are vulnerable to debris.
Flush and inspect irrigation systems as appropriate to water quality and crop hygiene requirements.
Maintenance & storage
Inspect components periodically for blockage, wear, leaks or physical damage. Keep installation tools clean and dry between jobs and replace damaged components rather than relying on temporary fixes in production systems.
Arrow-S Dripper Stake product details
| Product type | Arrow-S Dripper Stake |
|---|---|
| Primary use | delivering irrigation water at the pot or plant position |
| Application | Professional horticultural irrigation |
Arrow-S Dripper Stake FAQs
What is this product used for?
Delivering irrigation water at the pot or plant position. Is it suitable for professional irrigation systems?
Yes, where the component is compatible with the pipework, emitters and system configuration being used. What should I check before installation?
Confirm component and pipe compatibility, inspect the parts for damage and plan the connection so pipework is not kinked or under unnecessary tension. Should the system be tested after fitting?
Yes. Pressurise or run the irrigation zone and check for leaks, secure connections and expected water delivery. How can I maintain irrigation uniformity?
Inspect representative outlets, maintain filtration and flushing as required and investigate blocked or damaged components promptly. Can one irrigation run time suit every crop?
No. Irrigation duration and frequency depend on crop size, container volume, substrate, weather and emitter output. How should spare components or tools be stored?
Keep them clean, dry and organised so sealing surfaces, cutting edges and small waterways are protected from damage and contamination. Where should the stake be positioned?
Place it securely in the container or root-zone area so water reaches the growing medium without the tube being kinked or strained.
The Arrow Dripper Stake is designed for delivering irrigation water at the pot or plant position in professional nursery, greenhouse and horticultural irrigation systems.
Reliable irrigation depends on matching emitters, stakes, pipework and installation tools correctly so water is delivered consistently and connections remain secure.
Key benefits
Point irrigation at container level
Dripper stakes position the water outlet close to the crop root zone, helping keep individual container irrigation organised. Insert the stake securely without damaging important roots and route the connected microtube so it is not kinked or under tension.
Actual delivered water depends on the upstream dripper, pressure, pipework and system design. Where a flow figure is stated for the product, verify irrigation uniformity under the operating conditions of the complete system.
Checking irrigation uniformity
Periodically compare output across representative pots, particularly at the beginning and end of irrigation lines. Investigate blocked outlets, damaged tube, pressure differences or displaced stakes if crop moisture becomes uneven.
Irrigation system management
Good components cannot compensate for poor system design. Size pipework, zones and water supply for the required flow and pressure, and use suitable filtration where emitters or small waterways are vulnerable to debris.
Flush and inspect irrigation systems as appropriate to water quality and crop hygiene requirements.
Maintenance & storage
Inspect components periodically for blockage, wear, leaks or physical damage. Keep installation tools clean and dry between jobs and replace damaged components rather than relying on temporary fixes in production systems.
Arrow Dripper Stake product details
| Product type | Arrow Dripper Stake |
|---|---|
| Primary use | delivering irrigation water at the pot or plant position |
| Application | Professional horticultural irrigation |
Arrow Dripper Stake FAQs
What is this product used for?
Delivering irrigation water at the pot or plant position. Is it suitable for professional irrigation systems?
Yes, where the component is compatible with the pipework, emitters and system configuration being used. What should I check before installation?
Confirm component and pipe compatibility, inspect the parts for damage and plan the connection so pipework is not kinked or under unnecessary tension. Should the system be tested after fitting?
Yes. Pressurise or run the irrigation zone and check for leaks, secure connections and expected water delivery. How can I maintain irrigation uniformity?
Inspect representative outlets, maintain filtration and flushing as required and investigate blocked or damaged components promptly. Can one irrigation run time suit every crop?
No. Irrigation duration and frequency depend on crop size, container volume, substrate, weather and emitter output. How should spare components or tools be stored?
Keep them clean, dry and organised so sealing surfaces, cutting edges and small waterways are protected from damage and contamination. Where should the stake be positioned?
Place it securely in the container or root-zone area so water reaches the growing medium without the tube being kinked or strained.
The Irrigation Accessories collection includes essential components used to build, adapt and maintain irrigation systems in professional horticulture and landscaping environments. These accessories support system reliability, flexibility and long-term performance across nurseries, greenhouses and outdoor sites.
Supplied through horticultural distributors and garden wholesalers, irrigation accessories allow growers and landscapers to customise systems to site-specific requirements. This range is critical for maintaining efficient water delivery and reducing system downtime in professional operations.